How to build a Mini-NFT grow-pod
This page gives instructions for building deep tank vessels for small scale nutrient film technique (NFT) hydroponics trials, including spore production and time-lapse studies.
The first part will describe will describe how to assemble the latest, best-performing mini-NFT vessel. This will be kept updated if further improvements become available. The current design is the result of several years of tweaking and improvement. The second part of this page will describe some of the variations that have been tested, which might be useful for consideration of future modifications (and perhaps what to avoid).
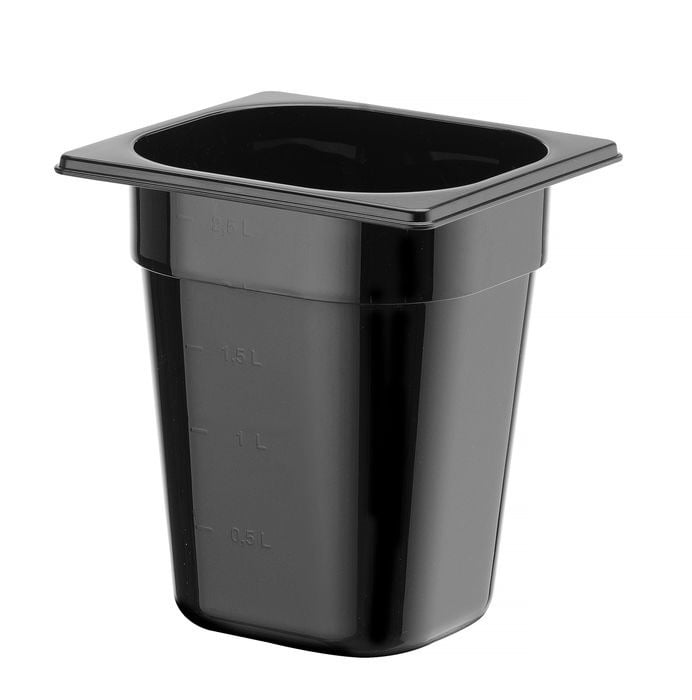
The core of the design needs to be a relatively low cost and accessible vessel to contain the nutrient solution and provide support for the NFT tray and lighting system. Conveniently, there is a standard set for production of vessels used in the catering trade. This is the Gastronorm (GN) standard which defines standardised sizes for food trays up to 200mm deep. The basic format is called "GN 1/1" and measures 530×325 mm, with other Gastronorm sizes being multiples and fractions of this basic module size. The vessels and lids are available in stainless steel and black and transparent plastic forms. The mini-NFT design uses a 200mm deep Gastronorm 1/6 black plastic vessel as container for the hydroponic media. Black vessels will help reduce algal growth. The 1/6 size has dimensions suitable for prolonged hydroponics culture, while being relatively compact and stable.
Standard “Gastronorm 1/6” industrial kitchen container (200mm deep). Features: maximum capacity 2.3 litres; dimensions 162(H) x 176(W) x 200(D)mm; black polycarbonate; temperature range -40°C to 100°C; weight 250g; dishwasher safe for easy cleaning. Example: Polypropylene Gastronorm Pan GN1/6 Depth 200mm Black Adexa GNPP16200B [£2.40] Similar catering vessels might be sourced outside Europe as Sixth-Size (1/6) or "6-inch" holding & prep containers.
2. NFT tray
Of course any vessel needs to be converted to provide a surface for nutrient flow and support of the plants. Marchantia plants provide some special challenges for hydroponic growth systems. Although the plants grow exceptionally quickly, they do not have a root system, rather they grow prostrate on a growing surface with ventral root hair-like cells (rhizoids) that take on substrate-anchoring and nutrient absorption roles. One major challenge is to provide the small plants with free access to nutrient media, while suppressing growth of algae.
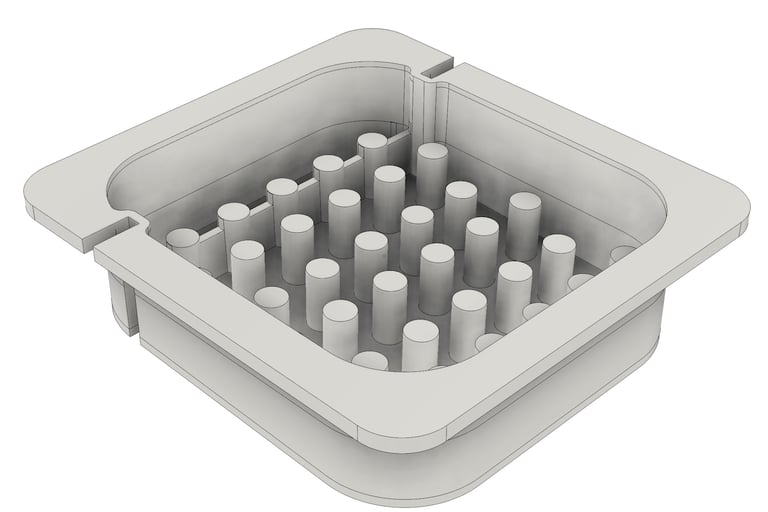
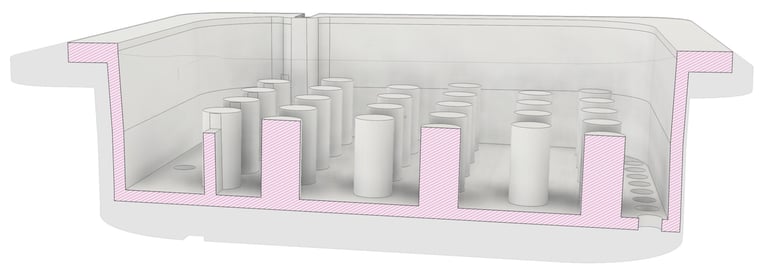
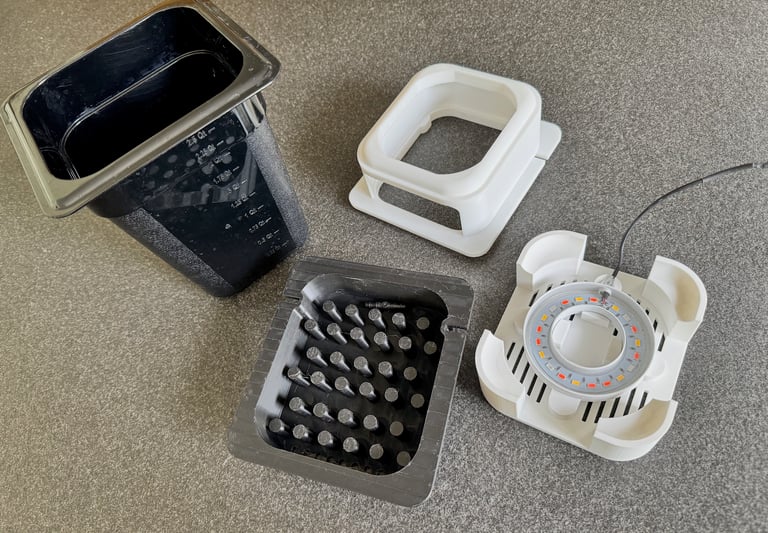
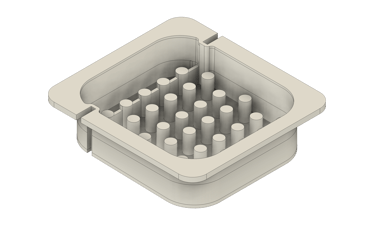
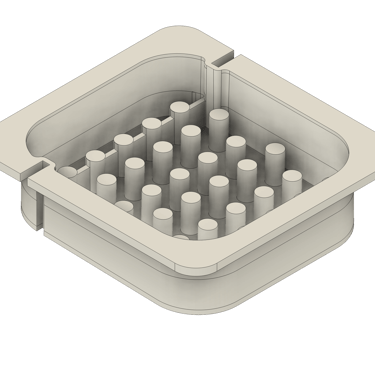
First, trays can be 3D printed to fit into the GN1/6 vessels and provide a surface for flow of nutrient medium under the Marchantia plants. These feature:
A drop-in design to fit into the GN 1/6 container. This makes the tray immune to problems with leakage as any stray media will directly drain into the vessel below. (It is difficult to reliably print waterproof objects with consumer 3D printers and low cost PLA filament).
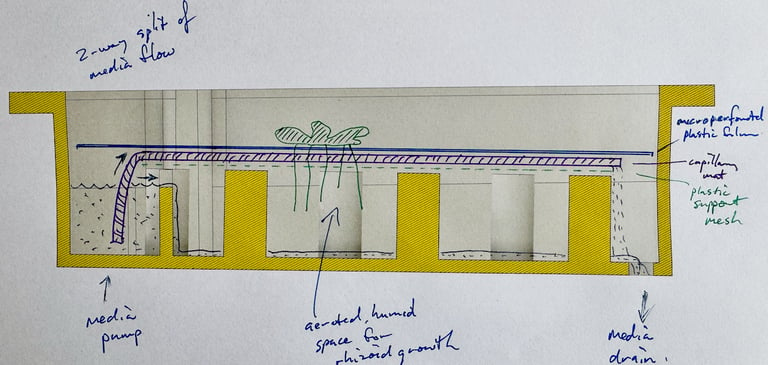
The suspended NFT tray has inflow port for insertion of a (1/4") micro-irrigation T-adapter for connecting the output of a submersible water pump. The tray has a sloping incline of 3% to 4% to allow flow of nutrient solution towards a series of outlet ports across the other, lower side of the tray. Nutrient solution can drip back into the media vessel below, which may help with oxygenation.
The inlet section includes a small trough formed by a 15mm high dam retainer to help regular distribution of hydroponic media across the tray, and form a pool that capillary matting can be dipped into to ensure proper wetting and distribution of nutrient solution through the matting.
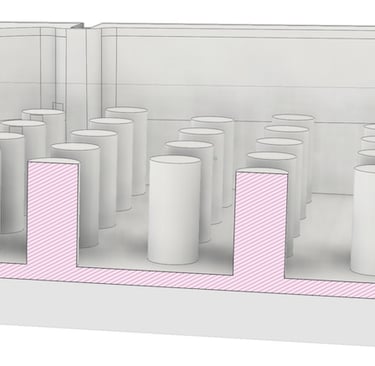
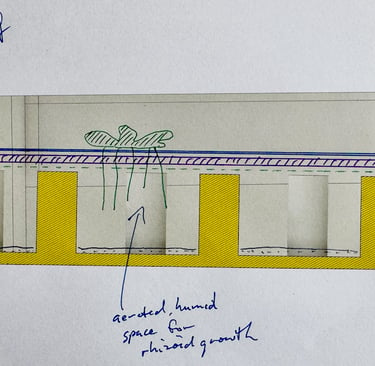
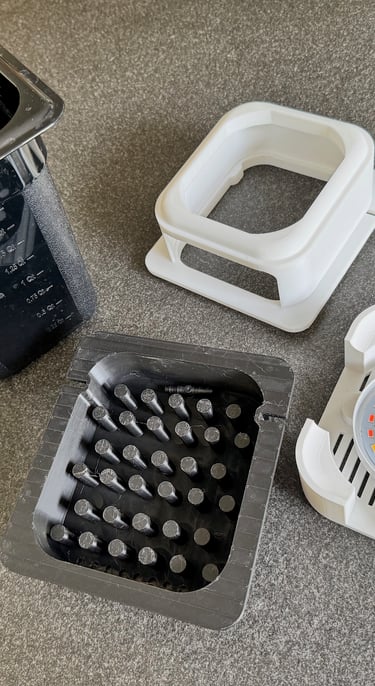
The tray has 10mm diameter, 20mm high cylindrical pegs which are placed in staggered rows 20mm apart. These create a gap between the bottom of the support matting and upper surface of the tray. Therefore the nutrient solution has a dual path for flow across the tray (i) through the layer of capillary matting and (ii) over the dam 'spillways' onto the tray surface. Wet capillary matting is necessary for recovery and early growth of transplanted thallus pieces or gemmae, while flow across the lower tray surface provides access for NFT feeding of rhizoids that quickly grow though the support matting. Marchantia rhizoids are single cells, but capable of rapid growth up to 5-10 cm under the right conditions. The support pegs create a space for free flow of nutrient solution, and a dark, humid and highly aerated space for proliferation of rhizoids.
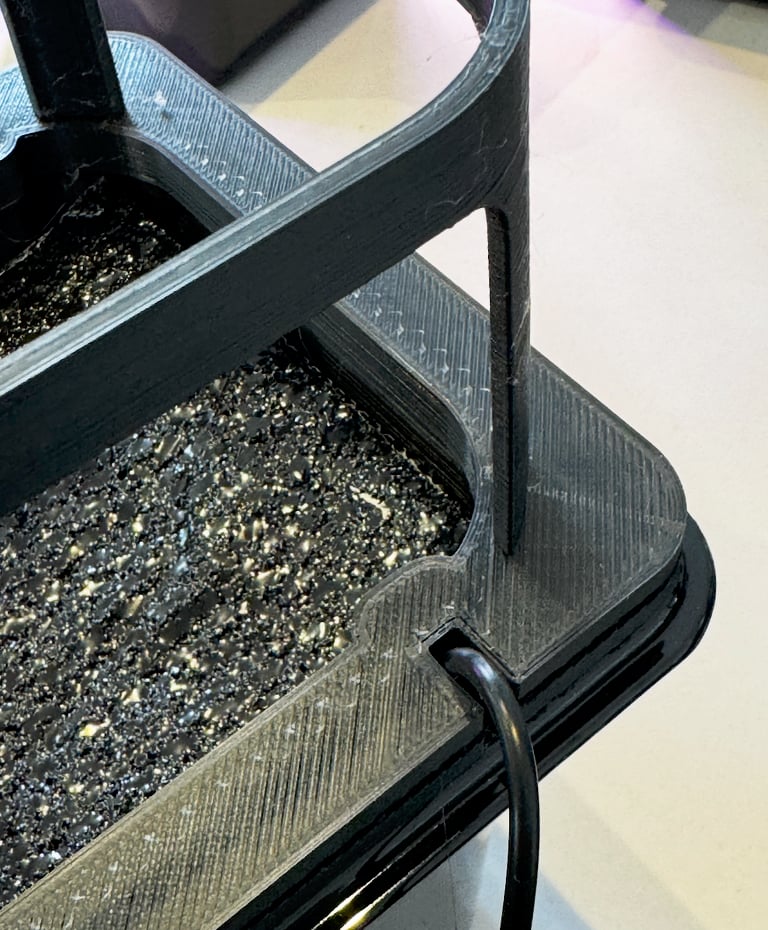
Two cable slots are incorporated into the design to allow simple placement and wiring of submersible pump (and an airstone, if needed).
Files for printing the mini-NFT trays can be downloaded from links below. I usually use black PLA filament (to limit light ingress for control of algae) and for reasons of cost and convenience, currently using Bambu Lab printers (but also Ultimaker and Creality printers in the past). The relatively small size of the trays means that they will fit on the print beds of smaller, cheaper 3D printers. The slicer setting should be set to generate support during slicing/printing, and a higher number of wall layers (4) and increased percentage infill (25-30%) helps make more robust prints. One downside to the use of PLA filament is that the trays are generally not dishwasher-safe, and will warp in the heat if washed this way. However hand-spraying with a disinfecting household cleaner, a scrub and thorough rinsing works to clean trays between uses.
3. Set up
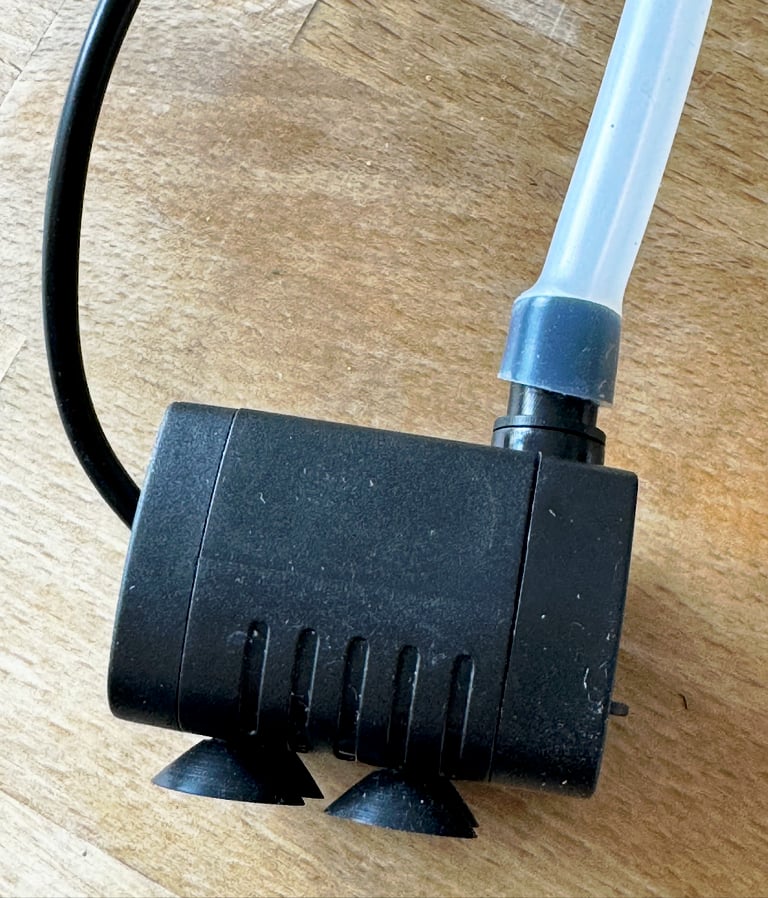
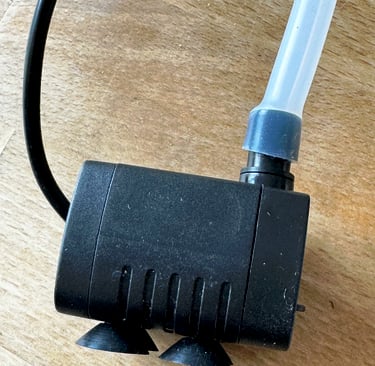
A submersible water pump is used to circulate the nutrient solution. USB-powered aquarium pumps are suitable and can be found for £6-8 online. An example is shown (below, left), which draws 3W and has a capacity of 200L/h. The rate of flow can be controlled by closing an inbuilt shutter over the intake, and a lower setting is used for small hydroponic tanks like these.
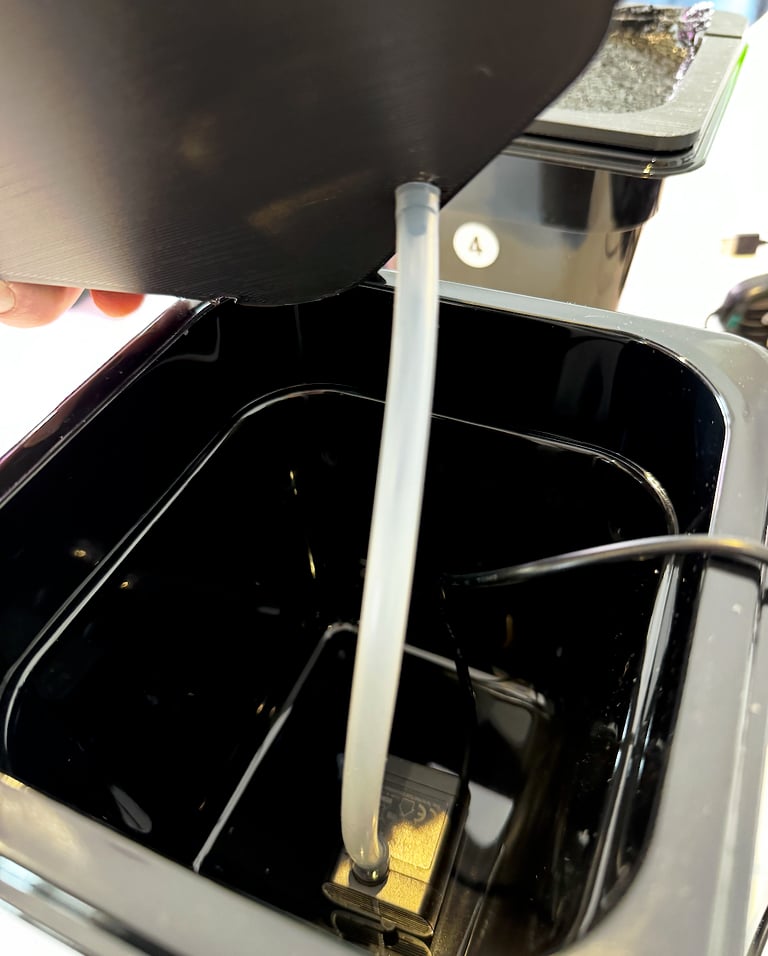
A length of silicone tubing (e.g. 7mm external diameter, 5mm internal diameter, approximately 16-18cm long) is pushed over the outlet port of the pump.
The pumps have suckers on their base, which are used to fasten the pump inside the base of the GN1/6 vessel.
The 3D printed tray should have a 4mm/7mm T-connector (commonly used for 1/4" drip irrigation systems) inserted through the inlet port so that the top of the 'T' junction is on the upper side of the tray with the two outlets pointing to opposite sides of the tray. Depending on the print, it can be useful to use a hand drill with a 6mm bit to ream the printed aperture to the correct size, and a silicone sealant/adhesive can be used to fix this in place if necessary. Allow all glued components to cure properly before use.
The free end of the silicone tube connected to the pump can be connected to the bottom end of the T-connector as the tray is inserted into the top of the GN1/6 tank. At the same time, the waterproof lead for the pump is slotted into one of the channels in the tray, designed for this purpose. This provides an essentially light-proof conduit. Note: the second channel can be used for a supply tube for an air bubbler, or sensor lead in more elaborate setups.
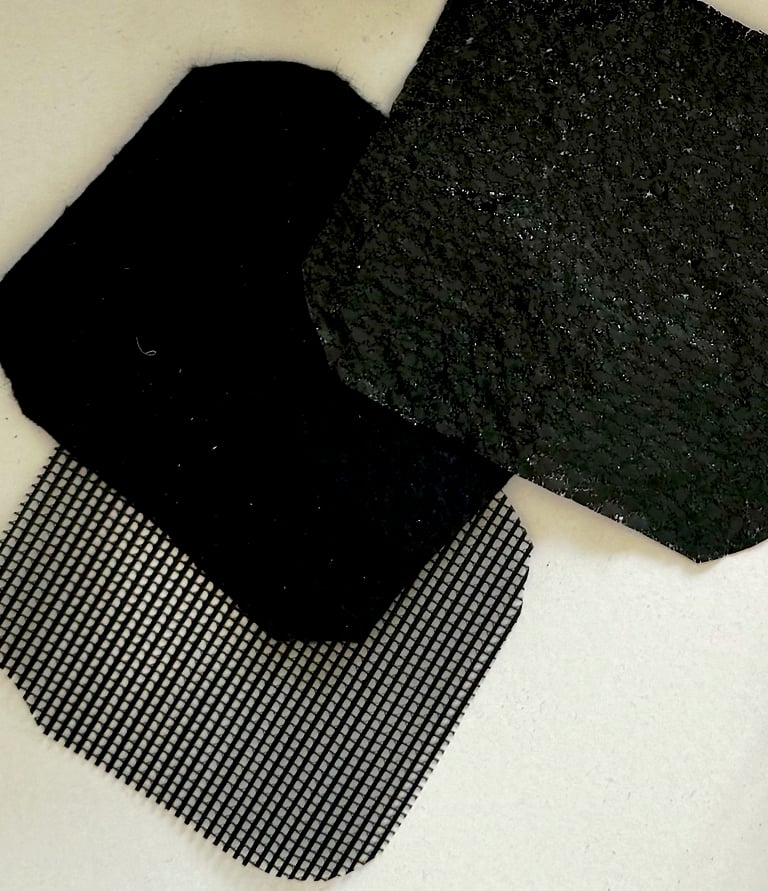
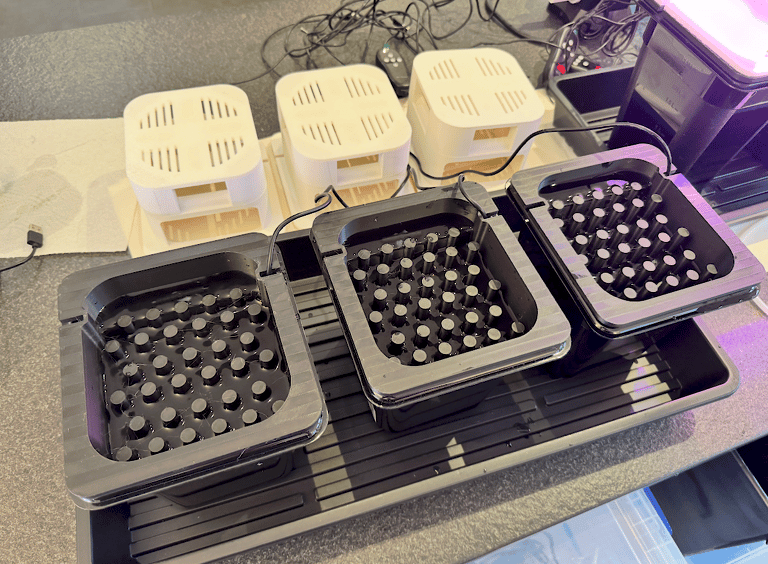
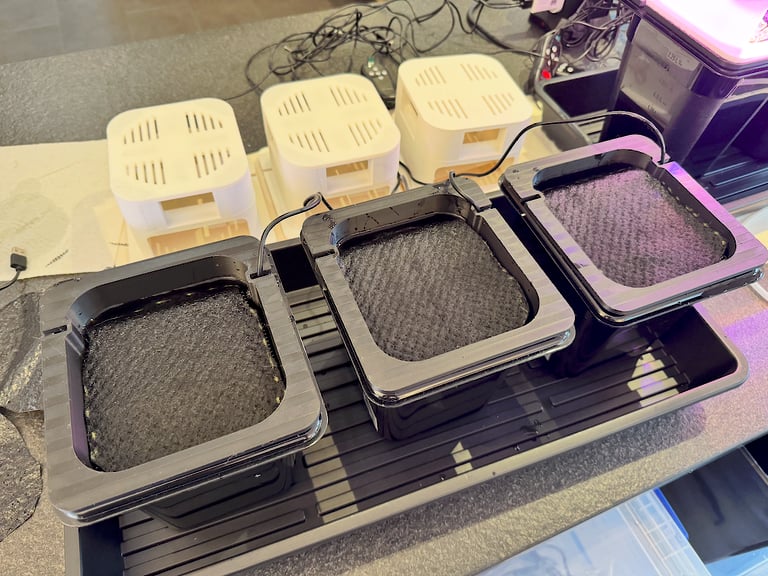
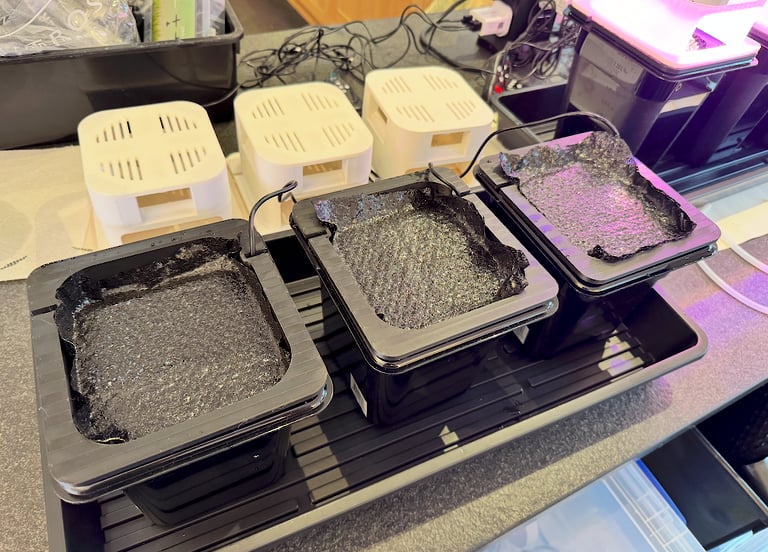
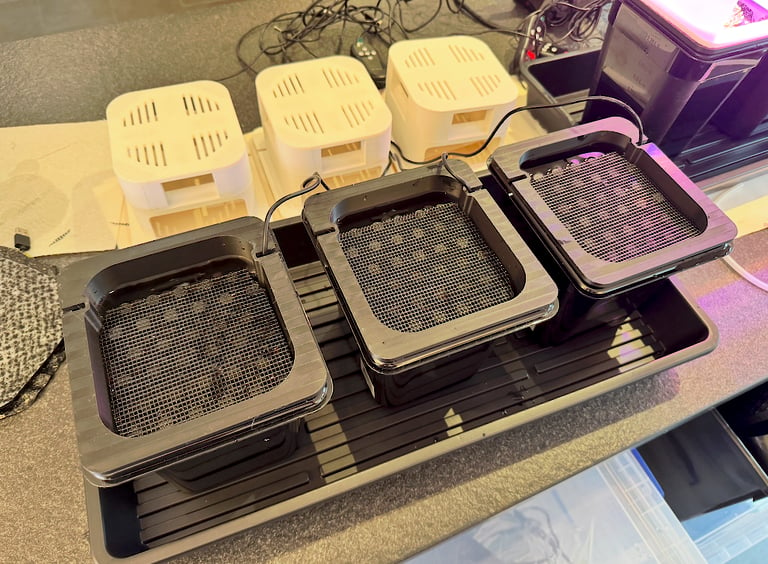
The trays are covered with three layers of pre-cut (i) mesh, (ii) Henofa Klavermat 300 capillary matting and (iii) Henofa micro-perforated black plastic film (shown below).
A layer of heavy duty 220gsm black PVC mesh (available from Amazon in 2m width, £8.99/m) is cut to size to fit into the 3D printed tray (first, right) and sit over the support pegs, leaving a gap where the inlet flow and dam are. This provides a layer of support to stop any sagging of the capillary matting (second, right)
A piece of pre-cut capillary matting is layered over the top. This piece should be several centimetres longer, so that a flap of capillary matting can be submerged in media behind the dam at the inlet. This acts as an efficient wick to draw solution into and through the capillary matting (third, right)
A piece of micro-perforated film is cut larger to completely cover the capillary matting and extend to the edges of the tray, to exclude light as efficiently as possible (fourth right). The film can be trimmed in place to ensure a neat fit.
At this point, the tank should be filled with nutrient solution. We use a commercial formula, Shogun Samurai Grow (for hard water), diluted 4mL per litre in tap water. The 200mm GN1/6 vessels will accept up to 1.7L of solution.
The pump needs to be connected to a USB power supply. Especially with multiple vessels, it is helpful to use a mains-connected multi-USB hub. The pump is run continuously at about 1/3 capacity (set by adjusting the intake vent on the submersible pump). Allow to run for at least 10 minutes until the capillary matting is thoroughly wet, and media is running across the tray and dripping back into the reservoir. Check the system regularly for proper nutrient flow.
The tray can now be 'seeded' with Marchantia gemmae or pieces of thallus.
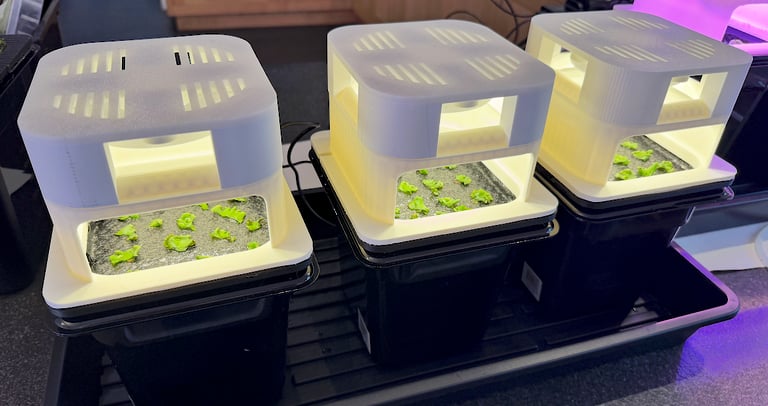
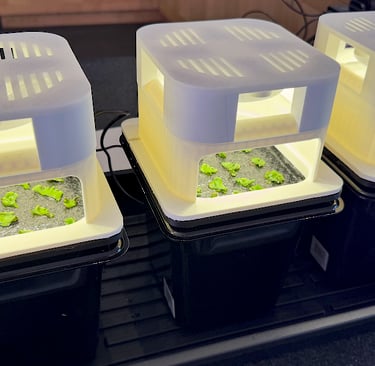
The aim of the designs tested here have been to create self-contained systems that are relatively compact, easy to assemble, low maintenance and which support vigorous growth of bryophyte plants like Marchantia, which lack proper root systems. So we have adopted systems that are triple stacked - where (i) a reservoir for nutrient media, (ii) a tray which provides a platform for plant growth and (iii) lighting system are stacked one on top of the other.
1. Vessel
It is useful to have access to small scale hydroponic systems for comparative trials - for direct comparison of growth conditions (light intensity, spectrum, photoperiod, nutrient quality, substrate, temperature, oxygenation of media, flow rates, CO2 concentration, etc.). For Marchantia, it is useful to have systems that can run essentially unattended for 3-4 weeks, which is the expected length of time for a harvest cycle or for generation of gametangia in the first stage of spore production. This requires a deep vessel that can hold a pump submerged for that period of time, without it being exposed and failing due to evaporation.
4. Grow lights
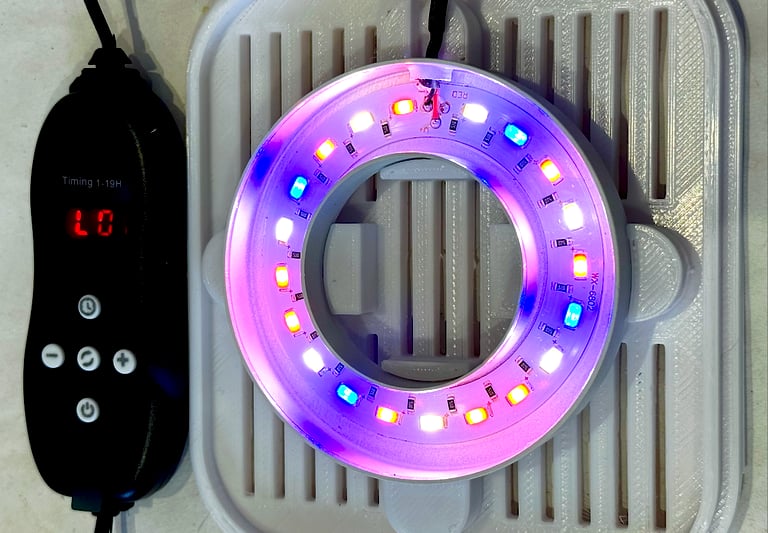
All of the hydroponic units have a self-contained LED lighting system. I tested a number of alternatives for the GN1/6 mini-NFT vessels. These were based on either USB-powered LED ring lights or mains-powered GX53 disc-shaped LED lights designed for under shelf lighting. The GX53 bulbs produced a high intensity and additional heat in these small vessels. The lower power, multispectral plant grow lights were a generally more suitable starting point.
A range of different types of ring lights are sold for supplementary lighting of house plants. These are generally described as 'angel' or 'halo' lights due to the halo-like look of the lights as they are supported on a spike above growing plants. They are generally composed of multispectral LEDs with a controller to regulate timing, LED balance and intensity, and available off-the-shelf at reasonable prices. However different brands produce a wide range of light intensities and wavelengths. Only some were suitable for optimal growth of Marchantia plants, which require 150-250 µmol/m2/sec photon flux (PPFD), with mainly red and blue wavelengths for vegetative growth. A number were tested (details provided below), and the type described here proved to be better suited for work with Marchantia. Most of the plant ring lights that are easily available from Amazon or Aliexpress appear to be rebranded versions from a few manufacturers in China, and it may be difficult to locate a light that is the exactly the same as the Roedax-Hao model described here (£10). Most plant lights have a combination of white, red and blue LEDs set into a ~90mm diameter ring, and have a metal or plastic stake to position them in a plant pot. The major difference between the available types is the intensity of light output. It's recommended that you test the light output with a meter positioned at the same distance from the light source as your plants. Digital light meters designed for daylight wavelengths and calibrated in Lux can be purchased for around £20, while simple meters for Photosynthetically Active Radiation (PAR) start at around £80, and meters with built-in spectrometers cost £200 and over.
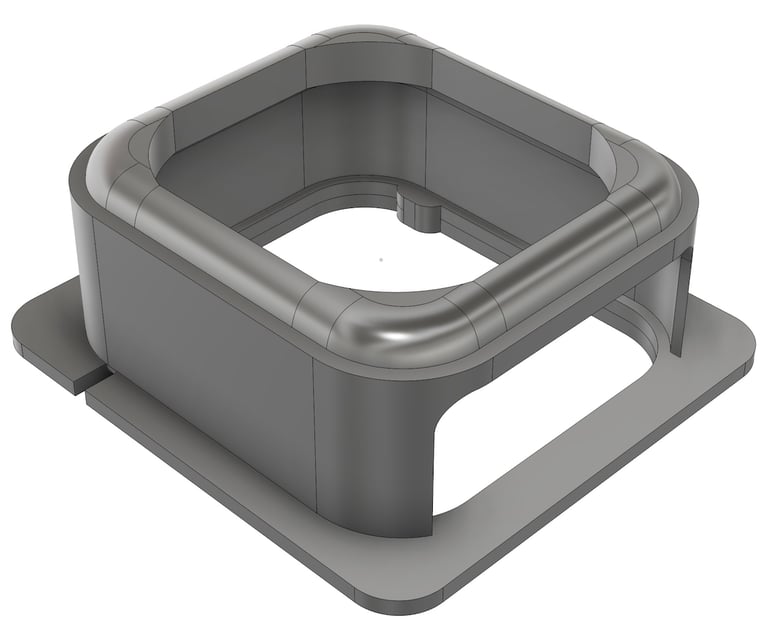
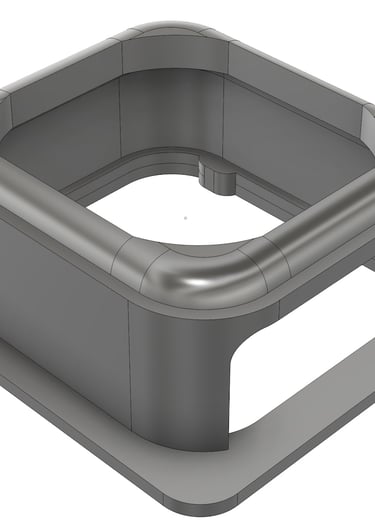
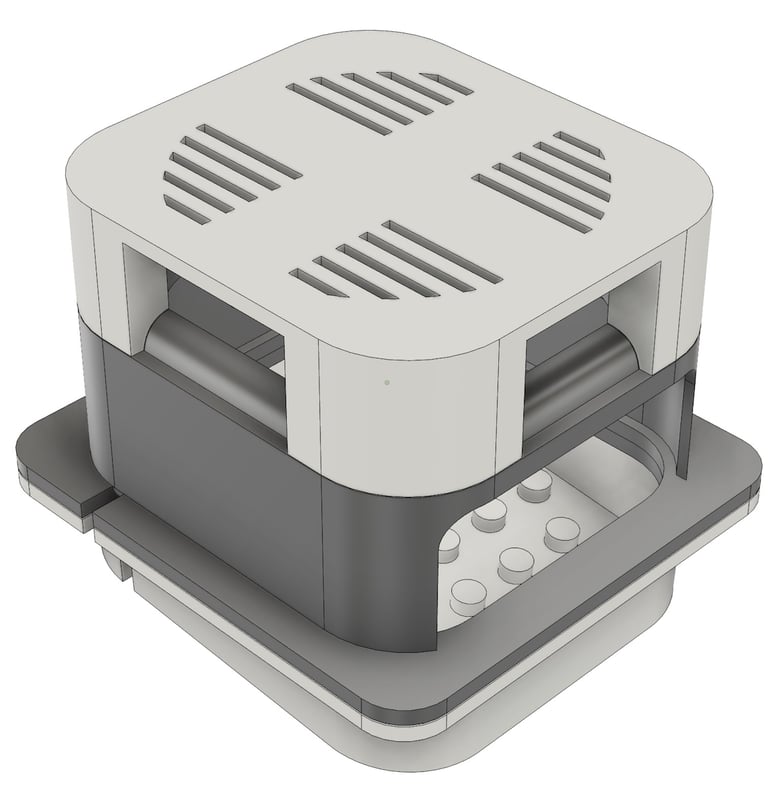
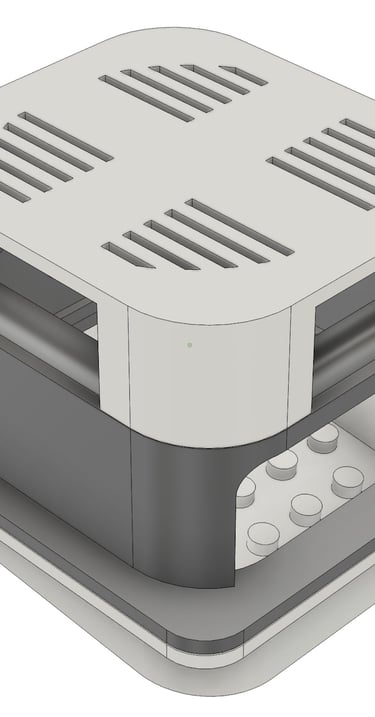
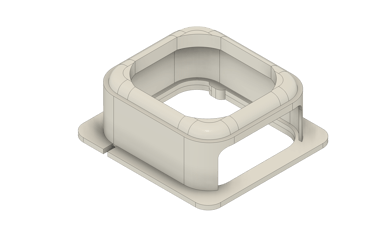
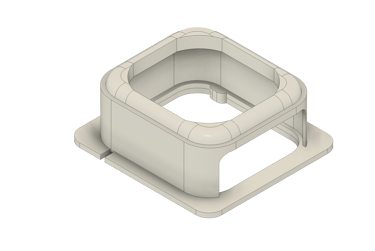
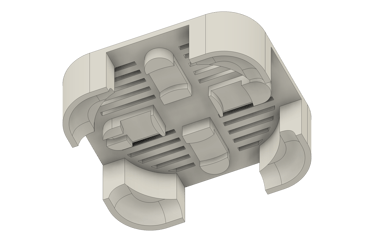
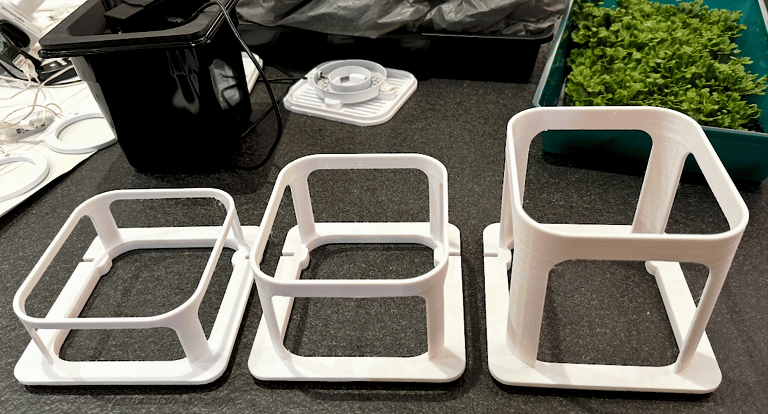
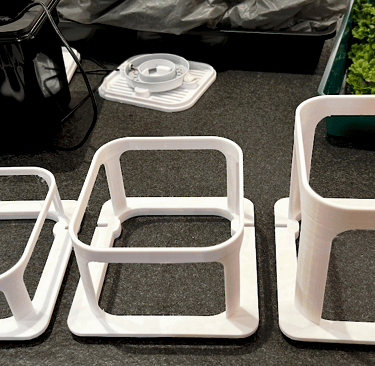
Testing showed that for this ring light, optimal light intensities corresponded to a distance of about 80mm between the source and the growing surface. More details are shown below. So a suitable support was designed using Fusion360 software, and 3D printed with PLA filament. The support is three-sided which may help maintain a higher local humidity over the plants. Holders for the ring lights are also 3D printed. Both the support and holder were designed to stack neatly on the NFT tray for simple handling. Renderings are shown of the 80mm light support (below, left) and the assembled stack of NFT tray, support and ring light holder (below, right). Usually the supports and ring light holders are printed in white coloured PLA, to give more reflective walls around the growing chamber.
5. Plant culture
The Mini-NFT systems are self-contained for media supply, flow and lighting, but rely on a suitable ambient temperature. This works well in a temperate climate like England, or in an air conditioned - central heated house or laboratory, but is something to keep an eye on.
Vegetative growth: With a free supply of media and good lighting conditions, Marchantia will grow very quickly. Thallus pieces will grow to completely fill the growing space within 2-3 weeks. The growth of gemmae is a little slower initially, as the small propagules take a few days to establish themselves, but rapidly catch up. Plants rapidly produce prolific rhizoids which grow into the spaces underneath the supporting membranes over the top of the tray. Likely this contributes to the vigorous growth of the plants.
Spore production: If you want to produce Marchantia spores, grow separate containers of male and female plants. With some encouragement from longer wavelength red light of use of older plant material, plants will produce gametangiophores and can be used for spore production - although for this, I prefer to use the larger NFT systems. As a guide it might take 3 weeks to see antheridiophore production, 4 weeks to see archegoniophores. Usually, I'd change the hydroponic media after a month, and this might coincide with fertilisation. For high yields of spores, harvest antheridiophores by plucking them from male plants, and simply drop them into a glass or beaker of water. Motile sperm will be released and the water will cloud. Load the cloudy solution into a clean spray bottle and liberally spray over female plants with archegoniophores. You can do this a couple of times, separated by a week. Then be patient, it will take around 4-6 weeks for the bright yellow sporangia to become apparent. These can then be harvested, dried and stored in fridge or freezer. Each sporangiophore can have up to 20 sporangia, and each sporangia can contain ~200,000 spores.
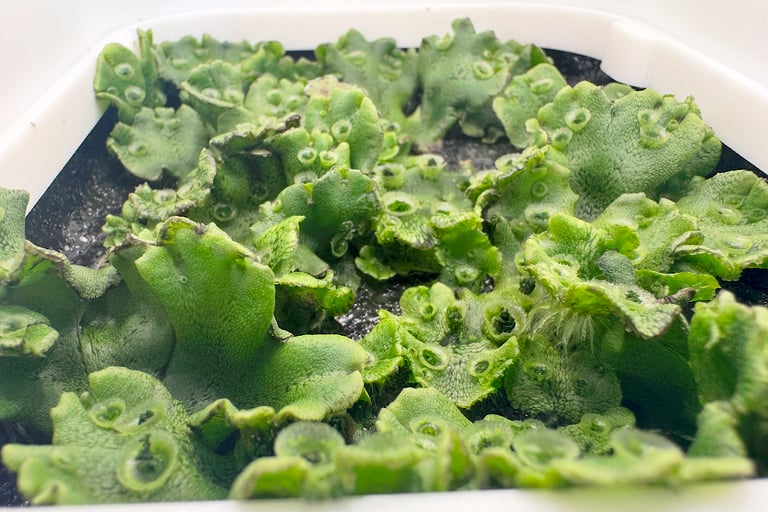
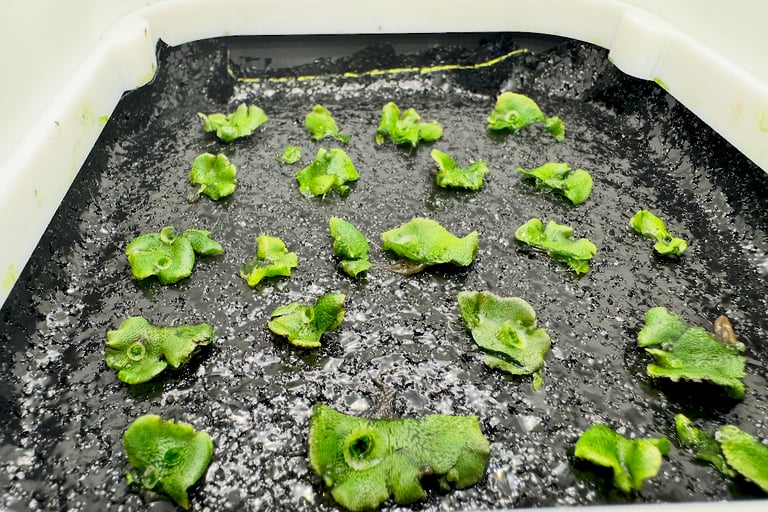
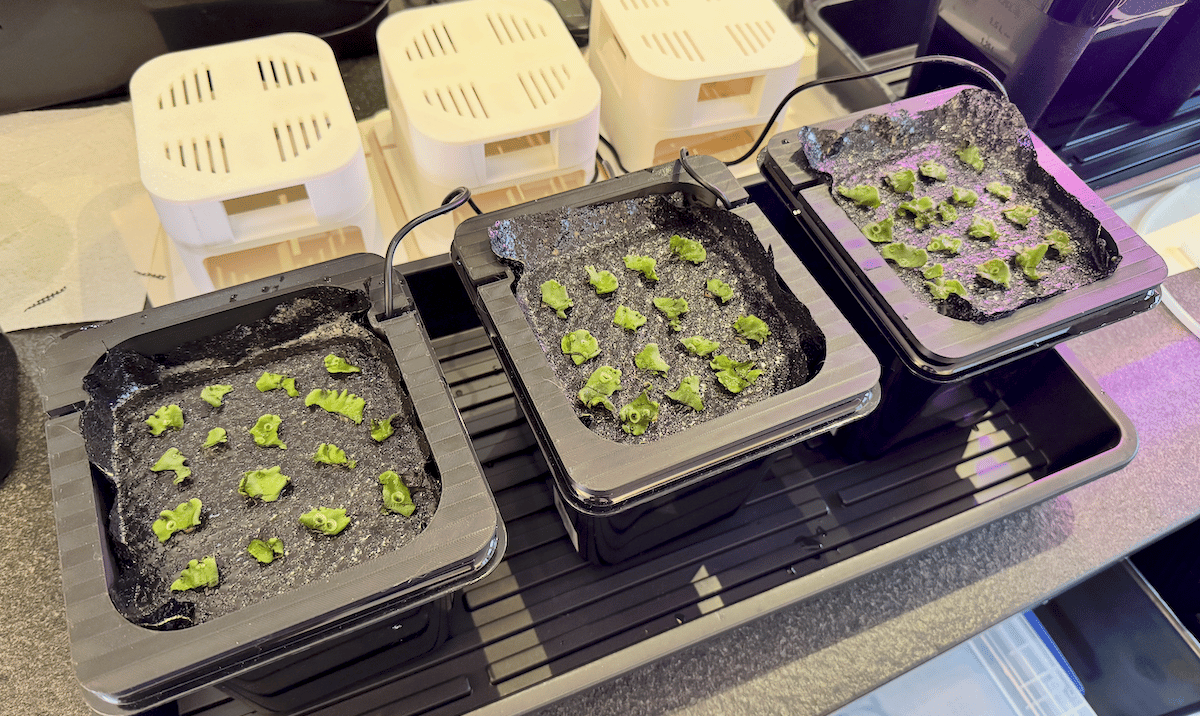
Day 0: Growing surface seeded with thallus pieces at Day 0
Day 14: Growing surface after a fortnight
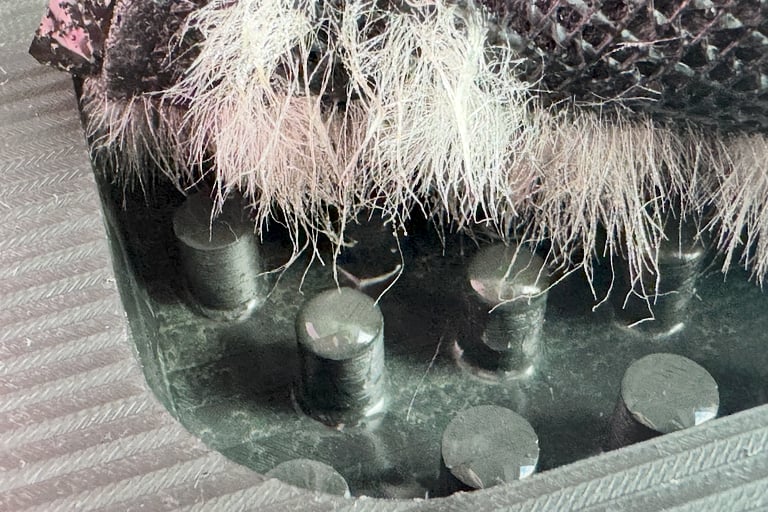
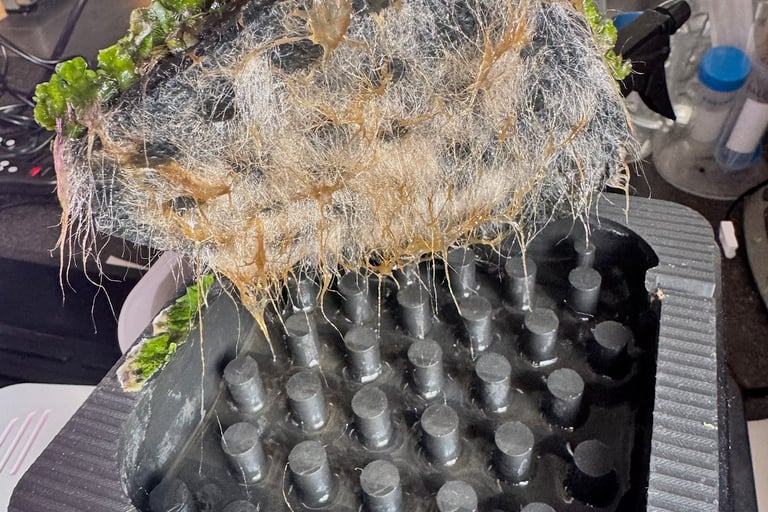
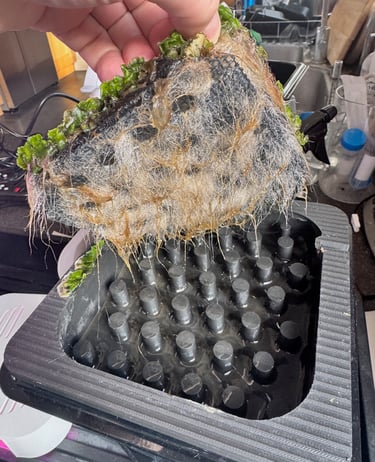
Day 14: Rhizoid growth after a fortnight
Day 30: Rhizoid growth after a month
I have tested a number of potential substrates for supporting Marchantia growth and the current favoured solution uses 3D printed trays with 20mm high support pegs to support: (i) a layer of heavy duty 220gsm black PVC mesh (available from Amazon in 2m width, £8.99/m). This provides a layer of support to stop any sagging, used in all of our NFT hydroponic designs. (ii) A dual layer of Henofa Klavermat 300 capillary matting covered with an attached surface layer of 30µm thick micro-perforated black plastic film. The Klavermat 300 + BF is available directly from Henofa, a specialist manufacturer of capillary matting based in The Netherlands (Download a specification sheet).
The Klavermat 300 + BF material has two important features - the capillary matting is black, light-shielding, and is highly efficient at drawing up water. Second, the attached micro perforated film has extensive and very fine (sub-millimetre) perforations. The fine and closely spaced perforations in the Henofa film make it a reliable surface for planting Marchantia tissue fragments or gemmae. However note that due to the small size of Marchantia spores, placing a suspension of spores on the film result in the majority of them being swept through the microperforations and end up underneath the film - so not recommended unless some form of encapsulation might be used. In practice, the use of the Henofa film greatly helps reduce problems due to algal growth (especially seen with mats without an impermeable covering) - due to effective permeability and light blocking. Any problems are usually due to over-wetting of nutrient solutions, with media being exposed on or across the growing surface.
Download Mini-NFT 3D files
Mini-NFT tray.step (3D CAD exchange file)
Mini-NFT tray.stl (3D CAD exchange file)
Mini-NFT support.step (3D CAD exchange file)
Mini-NFT support.stl (3D CAD exchange file)
Mini-NFT ringlight.step (3D CAD exchange file)
Mini-NFT ringlight.stl (3D CAD exchange file)
Additional parts
200mm deep black plastic Gastronorm 1/6 vessel: https://adexa.co.uk/Kitchenware-Tableware-355/GN-Containers-287/Plastic-GN-Containers-Black-366/Polypropylene-Gastronorm-Pan-GN1-6-Depth-200mm-Black-Adexa-GNPP16200B
USB-powered Roedak-Hua ring light with controller for plants: https://www.amazon.co.uk/spectrum-halo-adjustable-automatic-brightness/dp/B0C98W22Y2
USB-powered submersible water pump: https://www.amazon.co.uk/gp/product/B07TW39QXP
Plastic mesh for support: https://www.amazon.co.uk/dp/B00VG5AU30
Henofa Klavermat 300BF: http://capillarymatting.com/product/klavermat-300-bf-capillary-matting
Silicone tubing 7mm x 5 mm ID (18cm length): https://www.amazon.co.uk/sourcing-map-Silicone-Flexible-Translucent/dp/B07DLZY7RT
T-shape micro-irrigation fitting: https://www.amazon.co.uk/dp/B0912TRNG2
Multi USB-A mains adapter: https://www.amazon.co.uk/dp/B08L6Q43HF
Shogun Samurai Grow hydroponics concentrate: https://www.amazon.co.uk/SHOGUN-Samurai-Hydro-Grow-Water/dp/B07DDNNDSN
Note: the weblinks are provided as a examples, with connected details - not intended to carry any implied recommendation of the supplier.
Background information
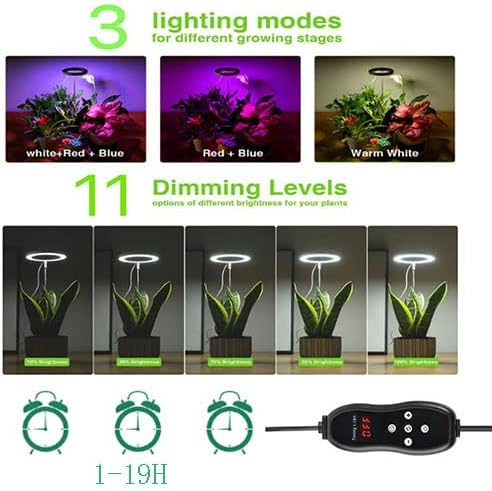
The Roedax-Hao ring lights consist of a mixture of red, blue and white LEDs which are powered from a USB cable via an in-built controller. The light intensity can be switched incrementally between levels L1 - L11. The lights can be toggled to activate red+blue, white or all LEDs. Light spectra for the different modes are shown below: blue and red LEDs (left); white LEDs (middle); all LEDs (right). Note that the Y-axes show component PPFD levels, with considerably higher intensities seen with all LEDs illuminated. All LEDs are switched on for normal plant growth. The white LEDs can be used alone for photography, to avoid colour casts. In addition, a light-dark cycle can be set, with the “daytime” lit portion of the cycle set from 1-19h or 24h per day. Marchantia plants grew somewhat faster under continuous light, compared to a 19h light/5h dark cycle and also shift quicker to the reproductive phase of growth, so I usually use a 24h photoperiod.
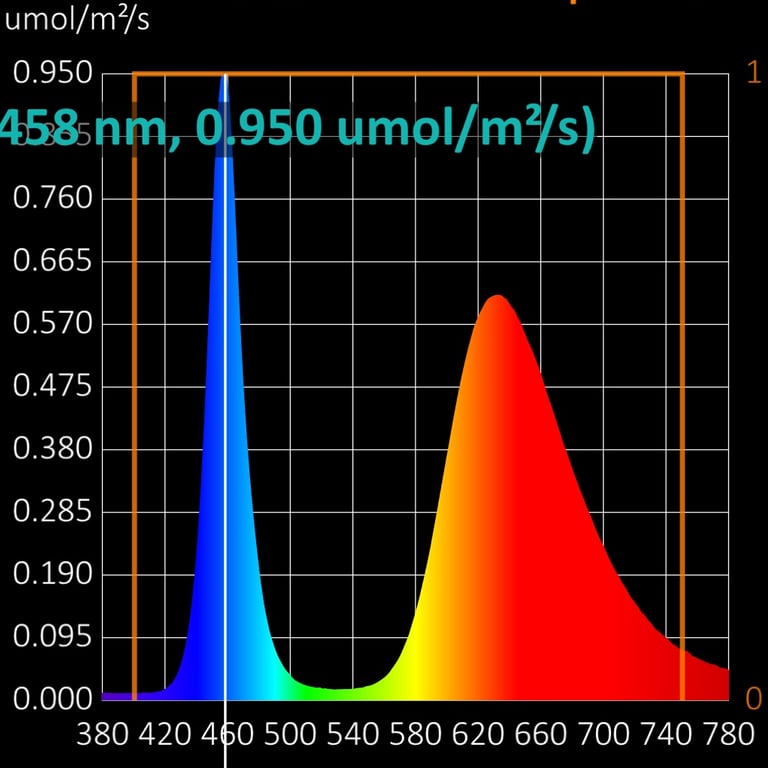
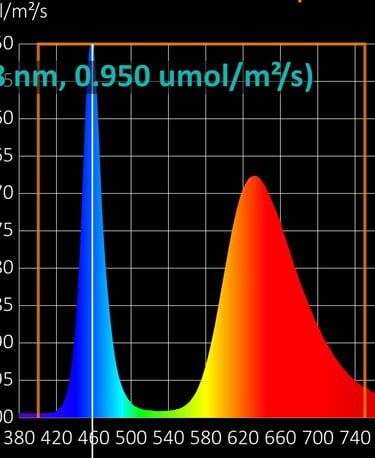
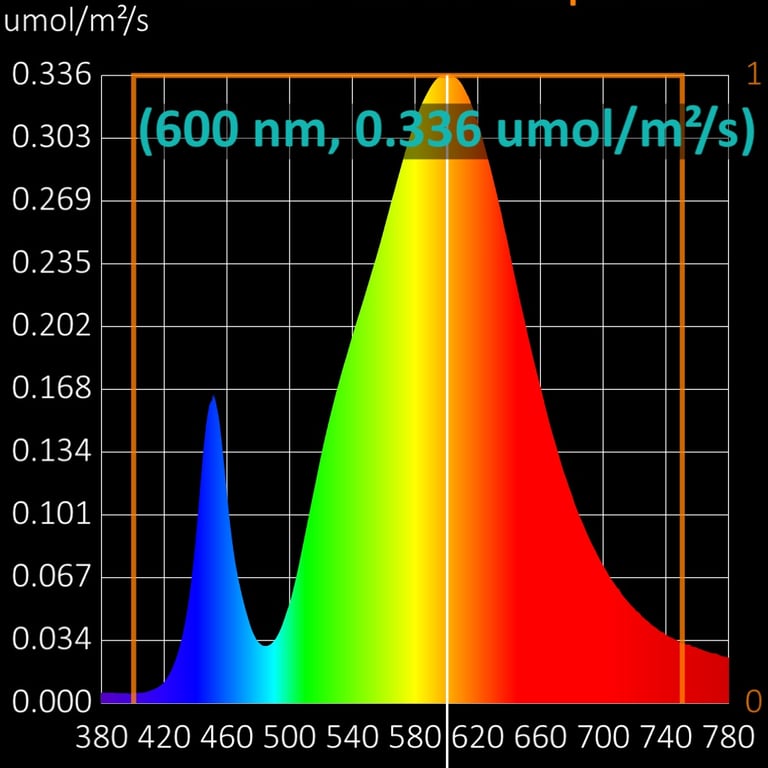
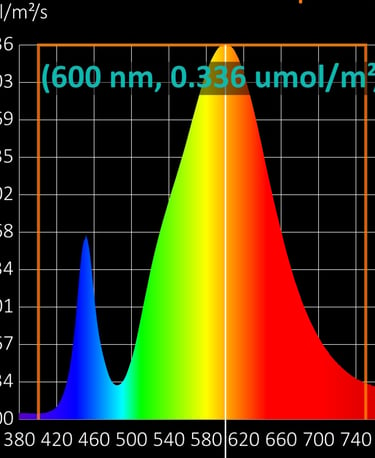
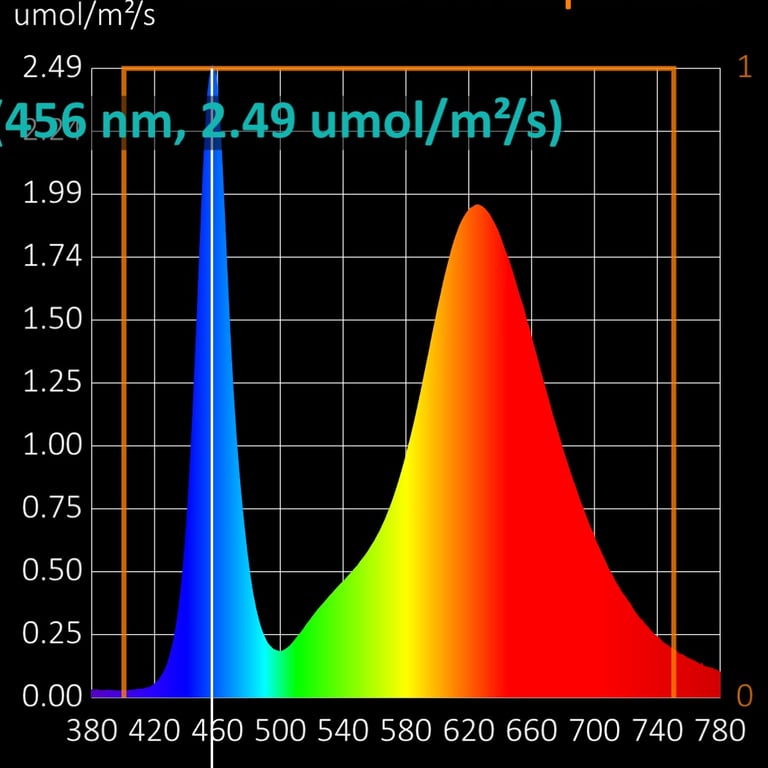
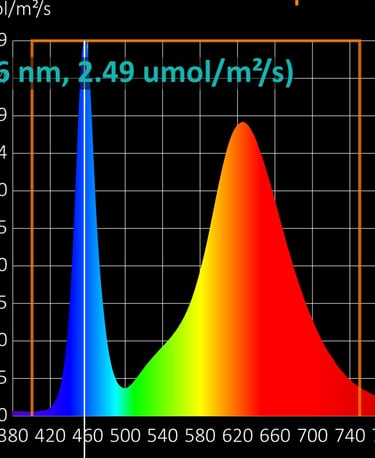
The Roedax-Hao ring light was connected to the GN1/6 hydroponics vessel with a 3D printed support, as described below. The height of this support regulates the intensity of light reaching the plants. Using the 80mm high support recommended here, Marchantia were grown with the highest intensity setting (level 11, L11), which provides ~230 µmol/m2/sec to the plants below when all LEDs are activated. (To measure this, 3D printed supports were made to suspend the ring light at 50mm, 80mm and 120mm above the growing surface, and incident light intensities were measured with an Apogee MS-100 spectrometer - using the different settings on ring light controller to alter spectral balance and intensity)
50mm housing
White+Red+Blue LEDs illuminated = 309 µmol/m2/s PPFD
Red+Blue LEDs illuminated = 206.4 µmol/m2/s PPFD
White LEDs illuminated = 127.4 µmol/m2/s PPFD
80mm housing
White+Red+Blue LEDs illuminated = 231.7 µmol/m2/s PPFD
Red+Blue LEDs illuminated = 147.4 µmol/m2/s PPFD
White LEDs illuminated = 92.2 µmol/m2/s PPFD
120mm housing
White+Red+Blue LEDs illuminated = 121.5 µmol/m2/s PPFD
Red+Blue LEDs illuminated = 81.8 µmol/m2/s PPFD
White LEDs illuminated = 47.7 µmol/m2/s PPFD
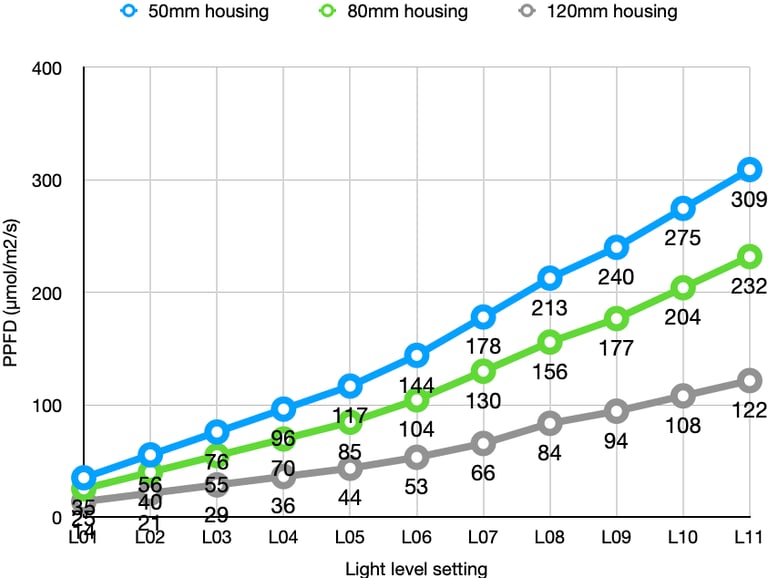
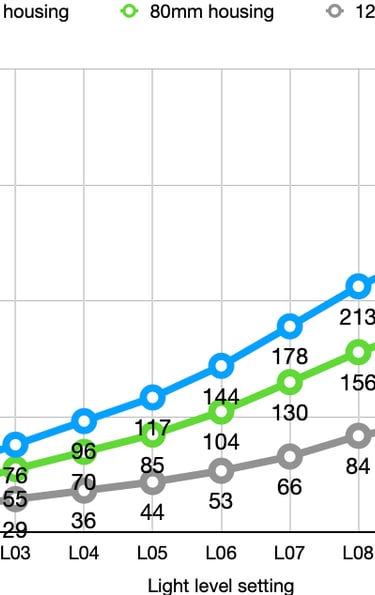
Above: PPFD light intensities at growing surfaces with different light housing heights and after adjustment of the controller levels.
Heat generation
Ring lights were run continuously for an hour and an IR non-contact thermometer was used to scan the backs of the lights for heating effects. The Roedax-Hao ring light ran relatively cool, showing temperatures of 28ºC - 35ºC across the back of the device. The Rodax-Hao device showed the best performance of several ring lights tested - with higher light output, lower temperature, flexible spectral switching and with the benefit of 11 levels of intensity and automatic timing up to 19h per day. Also, With this ring light, a housing height of 80mm was optimal, which allowed more clearance between light source and plants compared to ring lights with lower outputs.
Ring light assembly
Details for construction of ring-light illuminators for GN 1/6 hydroponic vessels. In its original form, the Roedax-Hao ring light housing has a steel fixture for mounting on an extended pole. The cable to the controller is threaded through this bracket, which needs to be removed for simple mounting in the custom GN 1/6 housing.
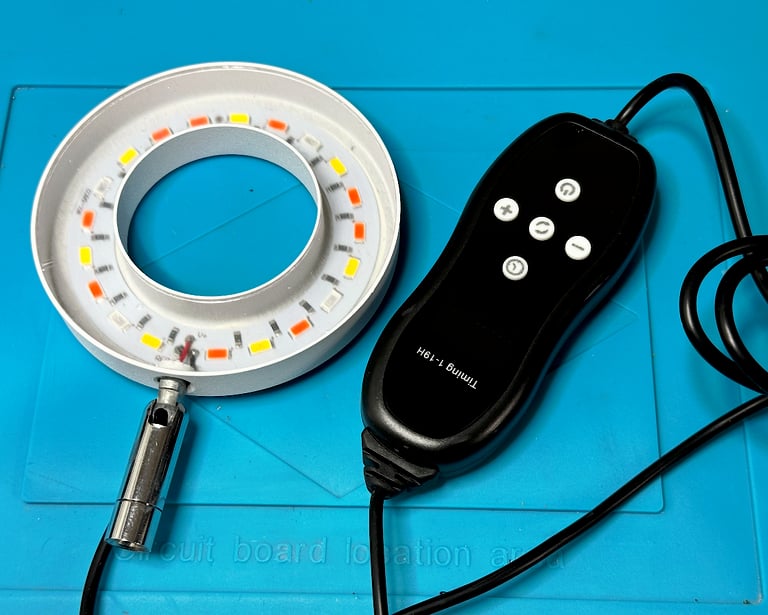
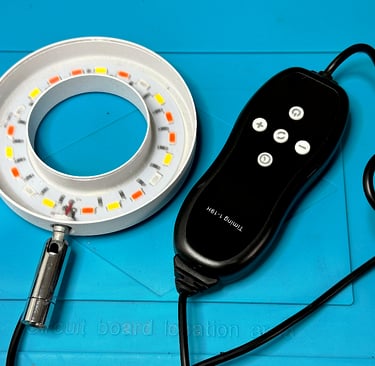
Unmodified Rodak-Hao ring light with controller.
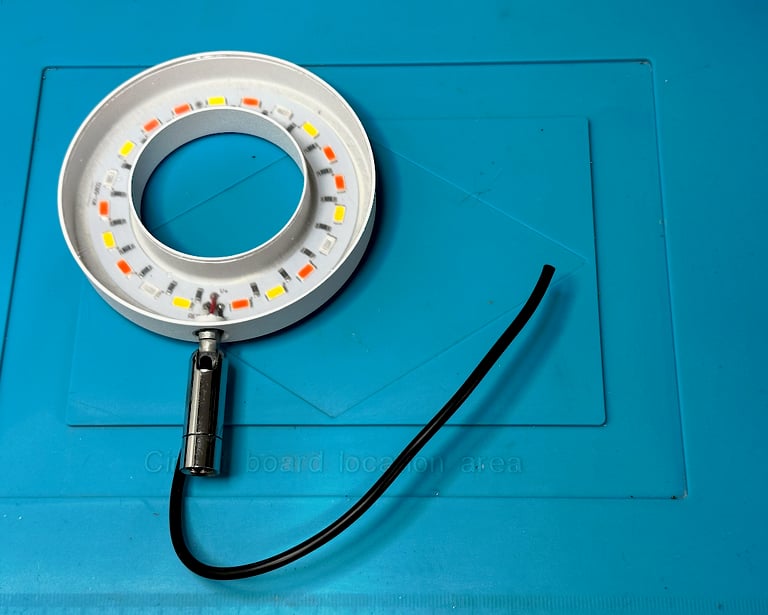
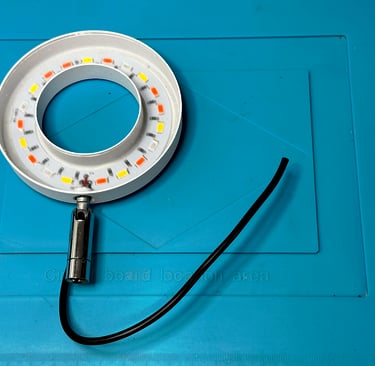
Step 1: Cut the cable between ring light and controller. I have chosen to cut 5-10 cm away from the ring light, to allow plenty of room for cable stripping and rewiring.
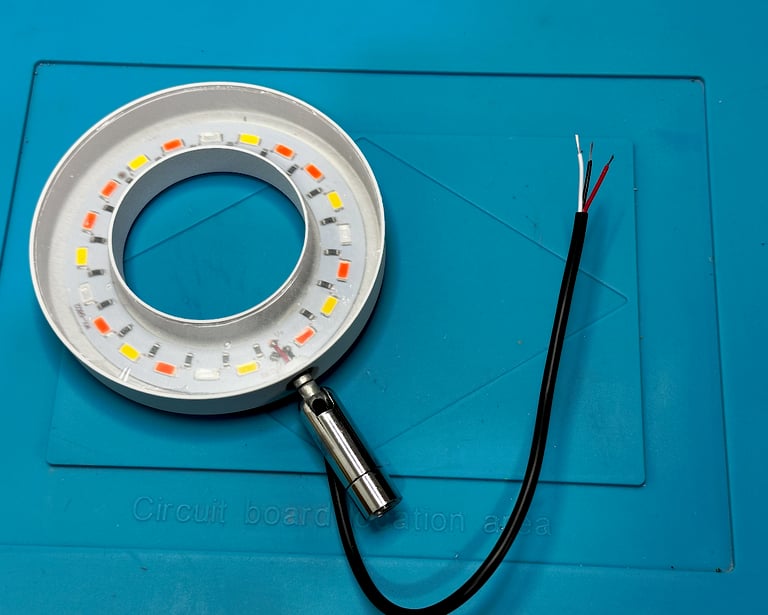
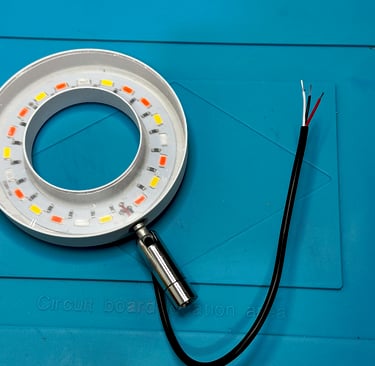
Step 2: Strip 2-3 cm of outer covering from the black cable. Remove 5-10mm of insulation from the colour-coded inner leads.
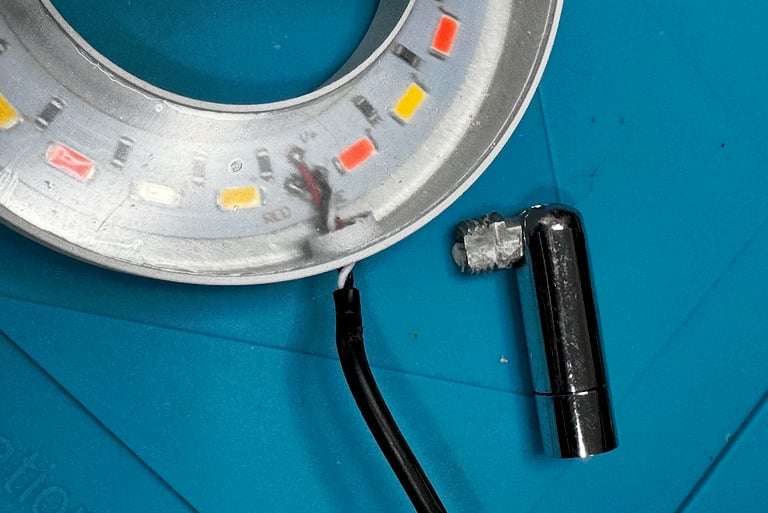
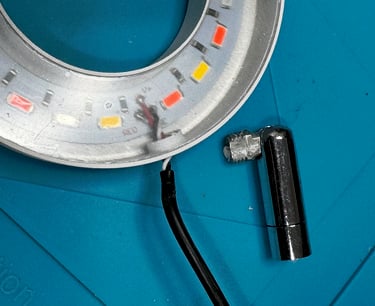
Step 3: Unscrew the steel support from the ring light using needle-nose pliers or spanner, being careful not to twist or damage the existing soldered leads.
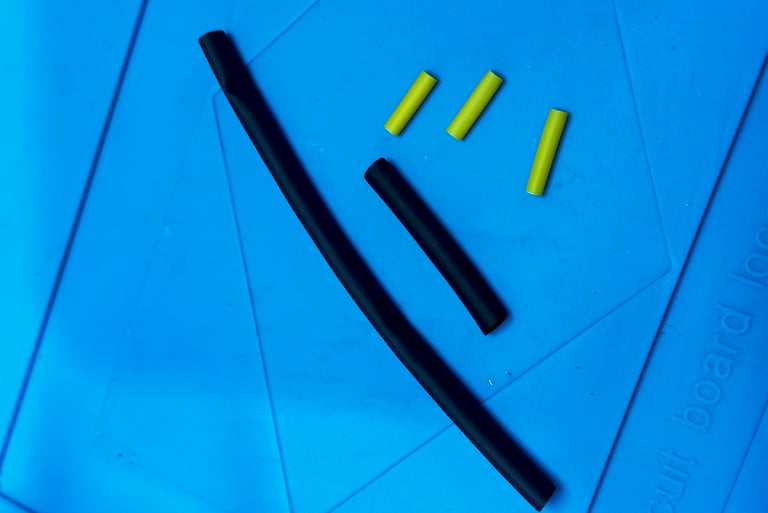
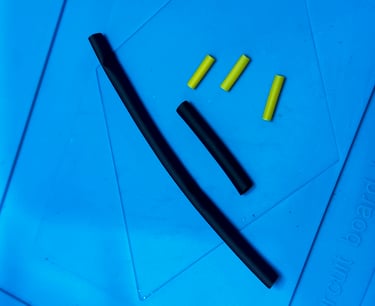
Step 4: Prepare some heat-shrink tubing to repair and support re-joining of the ring light and controller. These are (i) 3 pieces of ~1cm long, 2mm diameter (yellow) tubing; (ii) 1 piece of 3-4 cm long, 3mm diameter (black) heat shrink tubing; and (iii) 1 piece of ~8 cm long, 4mm diameter (black ) heat shrink tubing.
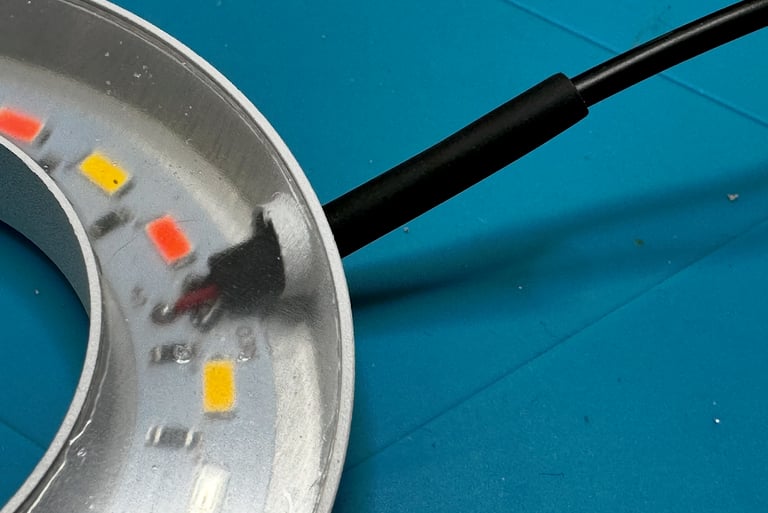
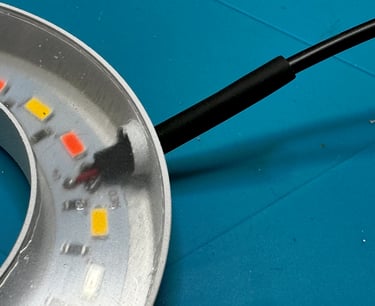
Step 5: Thread a piece of 3mm heat shrink tubing (3-4 cm long) over the cut leads, and push to the ring light housing. Use a heat gun to shrink the tubing, to provide some additional physical support.
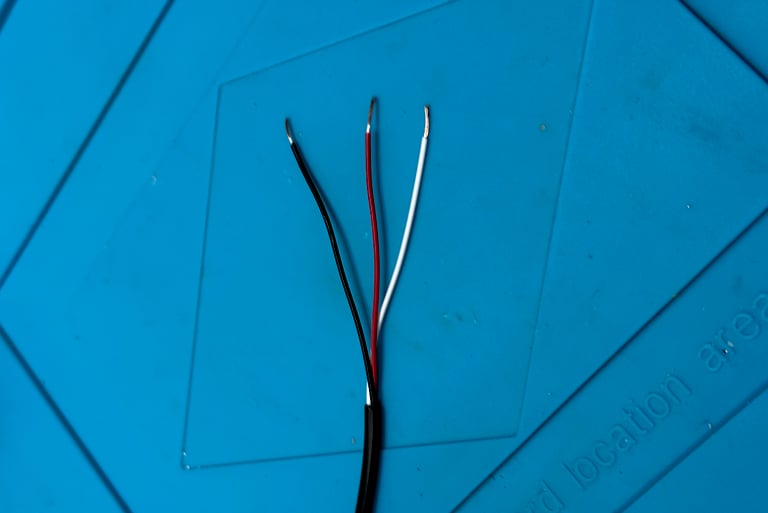
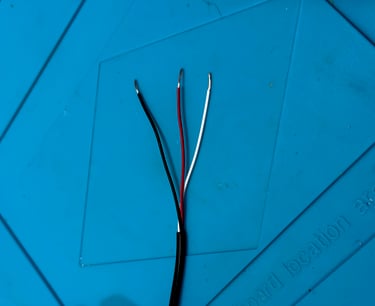
Step 6: Strip 5-6 cm from the lead attached to the controller. The extra length allows the use of heat shrink tubing to cover soldered joins between the leads of light ring and controller - and maintaining suitable spacing, so that the heat of soldering does cause the tubing to shrink before needed. Strip 5-10 mm of insulation from each of the inner, colour-coded leads.
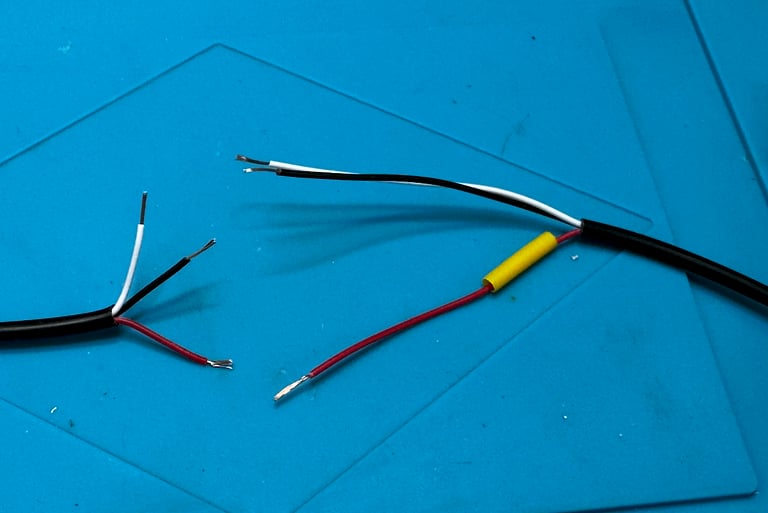
Step 7: Thread the 4mm diameter, 8cm long piece of heat shrink tubing over the cable leading to the controller, and push fully away from the cut end. Similarly, thread a 1cm long piece of the 2mm diameter (yellow) over one of the cut and stripped inner leads attached to the controller, and push fully away from the cut end.
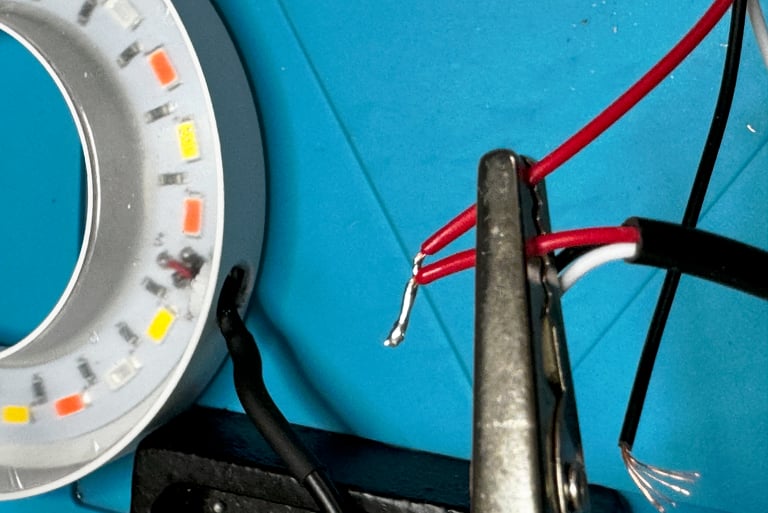
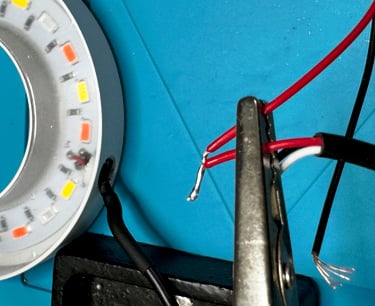
Step 8: Take matching colour leads from the controller and ring light connected cables. Twist the stripped ends together and solder. A “third-hand” stand is helpful for this.
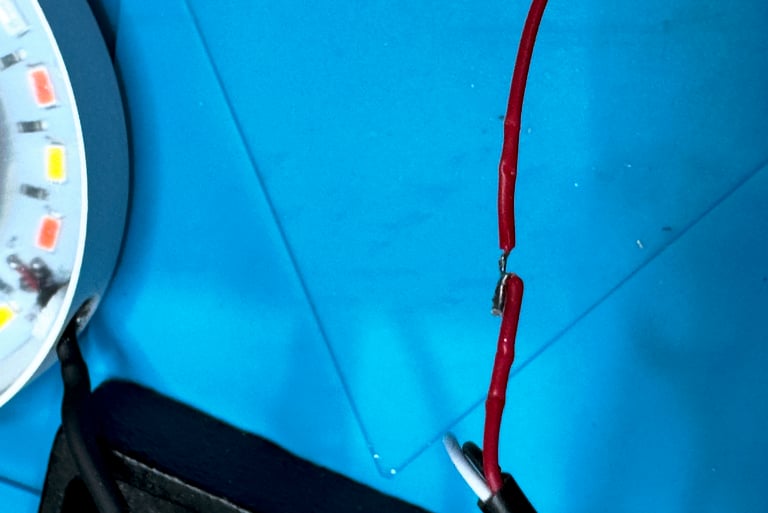
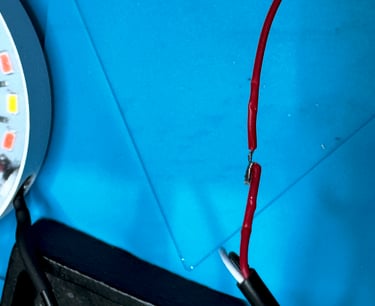
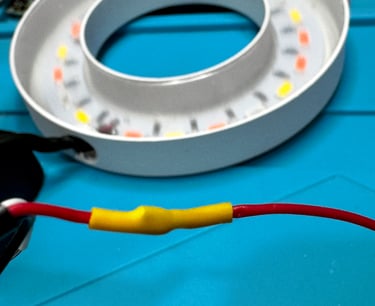
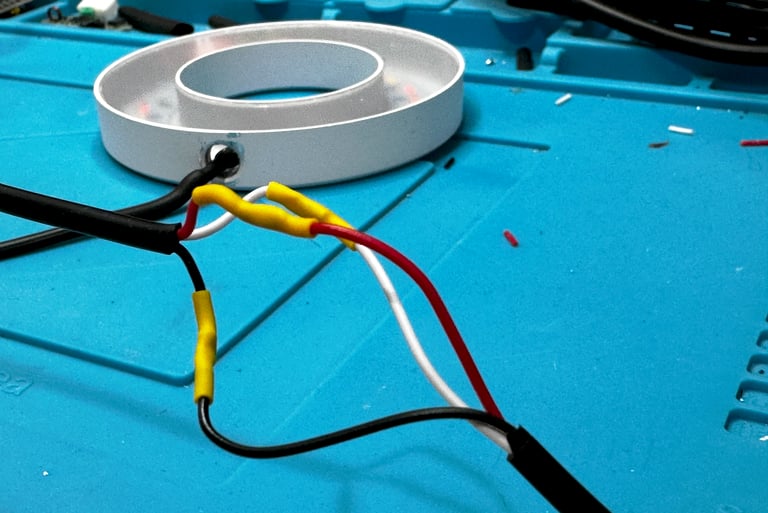
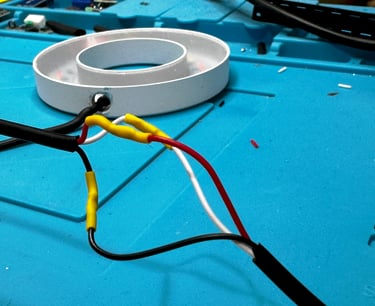
Step 9: Trim the soldered leads with side cutters if necessary. Fold the soldered joint back on itself.
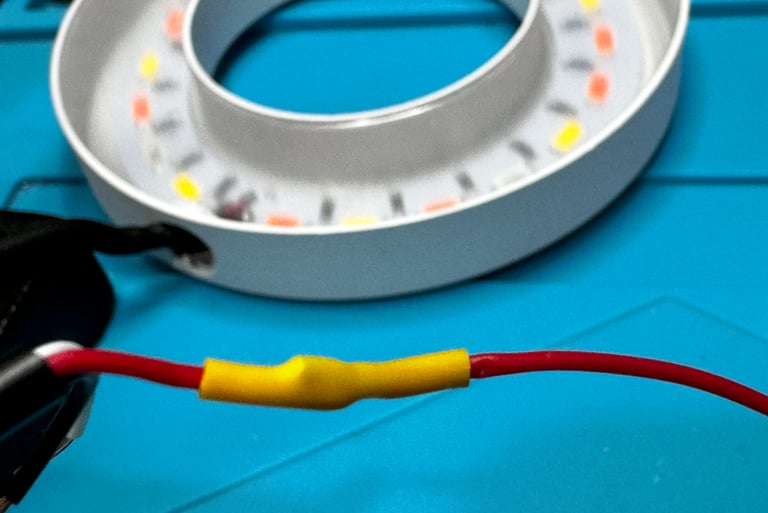
Step 10: Reposition the 1cm piece of heat shrink tubing over the joint, and use a heat gun to shrink the tubing securely over the joint, to fully insulate it.
Step 11: Repeat for the other colour-coded leads.
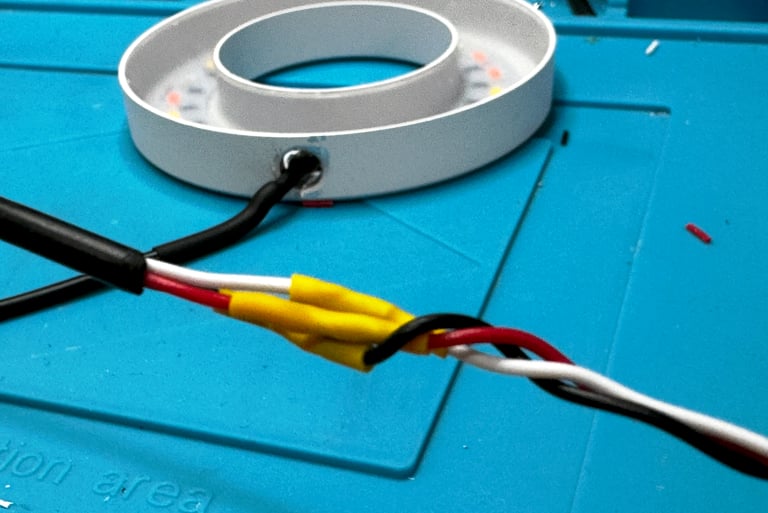
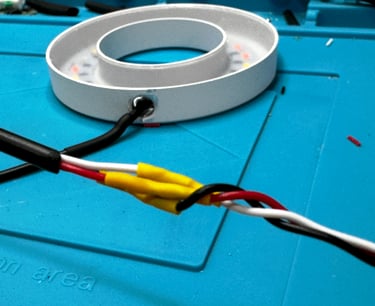
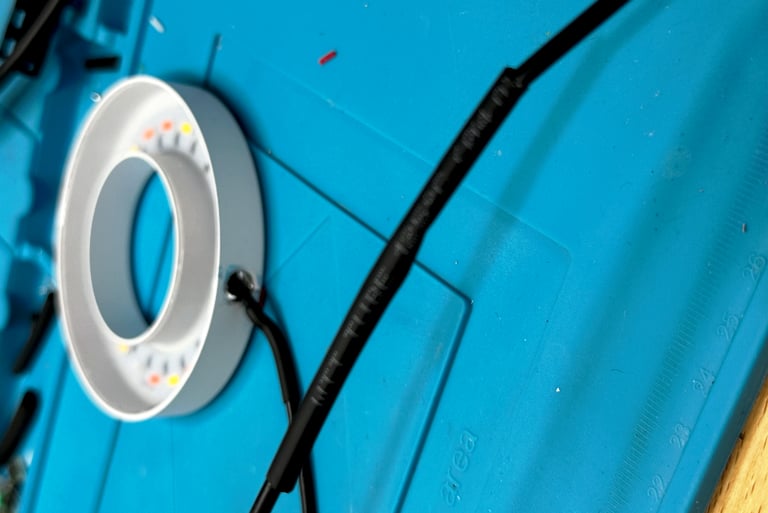
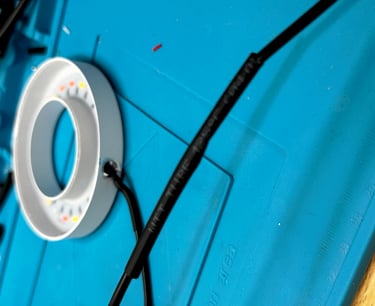
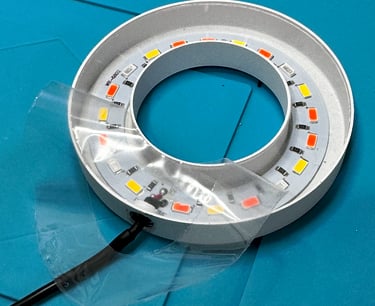
Step 12: Bundle the leads to form a compact triple join.
Step 13: Reposition the 8cm long piece of 4mm diameter heat shrink tubing over the triple join, and apply a heat gun to form a secure junction.
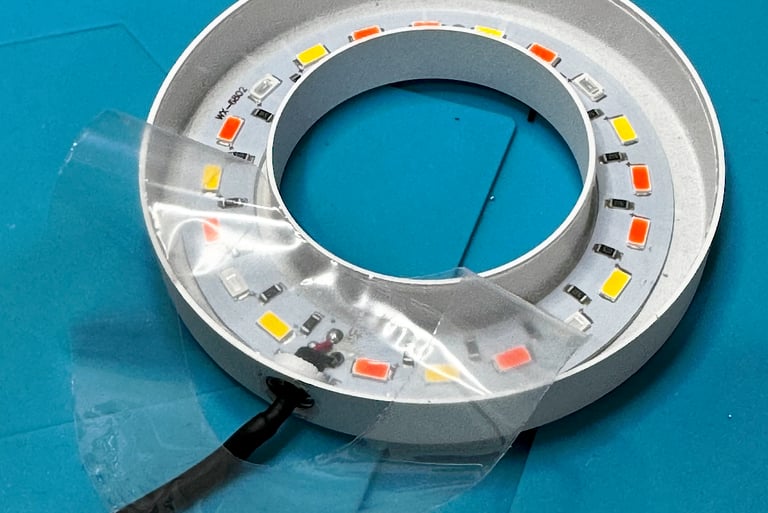
Step 14: At this point, remove the plastic covering found over the ring light window.
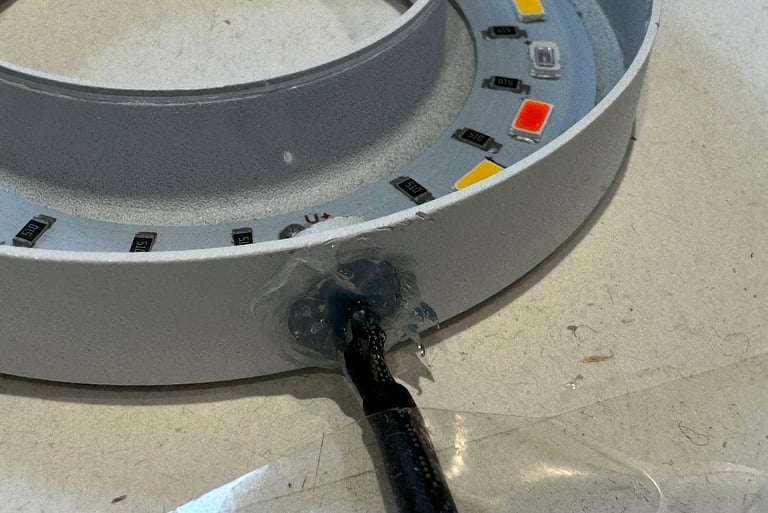
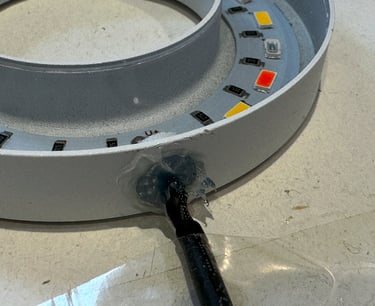
Step 15: Seal the opening where the cable enters the ring light housing with silicone sealant/adhesive. Here, the cable can be taped to the underlying surface as the sealant takes 24h to cure properly. Alternatively, epoxy putty can provide a more substantial seal.
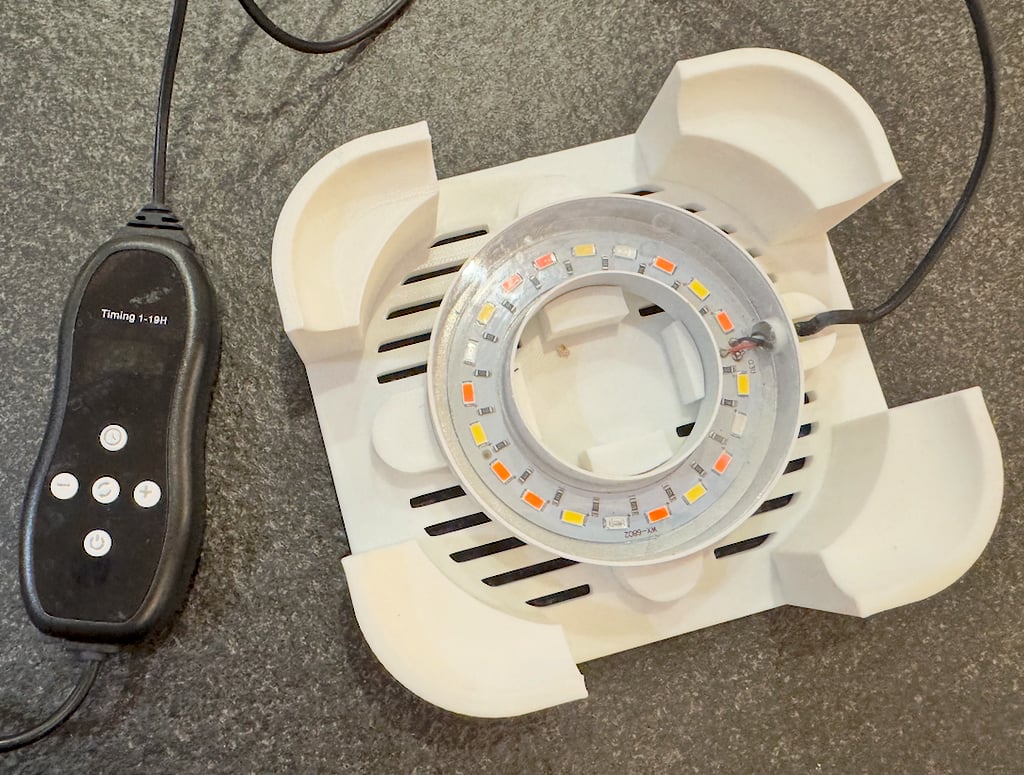
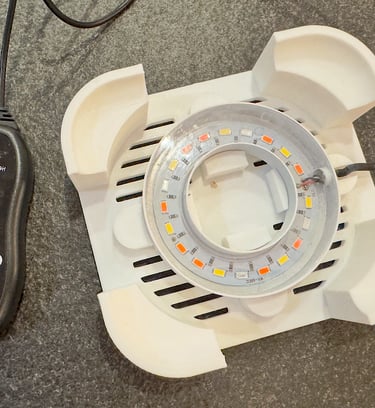
Final step: Attach the modified ring light assembly to the 3D printed housing with silicone or epoxy resin adhesive, being sure to secure the cable in the 3D printed notch.
Marchantia as a platform for engineering plants
About Biomaker OpenPlant Cambridge Lab
Jim Haseloff
jimhaseloff@gmail.com

