How it started
I started collecting and growing Marchantia isolates in 2010, after listening to an inspiring talk from Kimi Ishizaki about his doctoral work with Takayuki Kohchi in Kyoto. I knew of Takayuki's early work, as we'd been post-docs together in Howard Goodman's lab at Harvard about 20 years earlier - but to hear of the intervening developments in plant culture, transformation and genetics was a wake-up call. The pioneering work that they and their colleagues had done made it clear that Marchantia had unique benefits of simplicity and experimental speed and access that were ideal for our engineering aspirations. I took to haunting local (poorly maintained) plant nurseries around Cambridge and purchasing plants that had suffered invasion by male and female Marchantia. I isolated and grew the isolates, looking for vigorous vegetative growth and ease of spore production. Of these, a single pot containing a Callistemon rigidus shrub (bottlebrush plant) gave rise to the Cam-1 (male) and Cam-2 (female) isolates. Although Callistemon originate from Australia, the Marchantia were likely local invaders. Those early days were characterised by construction of homemade LED panels, hacking Ikea bookshelves for growth racks and experimenting with simple propagation methods, mainly using Jiffy 7 peat pellets.
Choosing a propagation technique
As time has gone by, we have explored a wider variety of propagation techniques, which promise faster growth, pod-like growth vessels and less waste. This has been a pet project of mine - as low-cost systems would have major impact on the use of the Marchantia system for day-to-day research, including for education and community labs - and open the prospect of larger-scale production of engineered biomass under contained conditions.
Soil substitutes
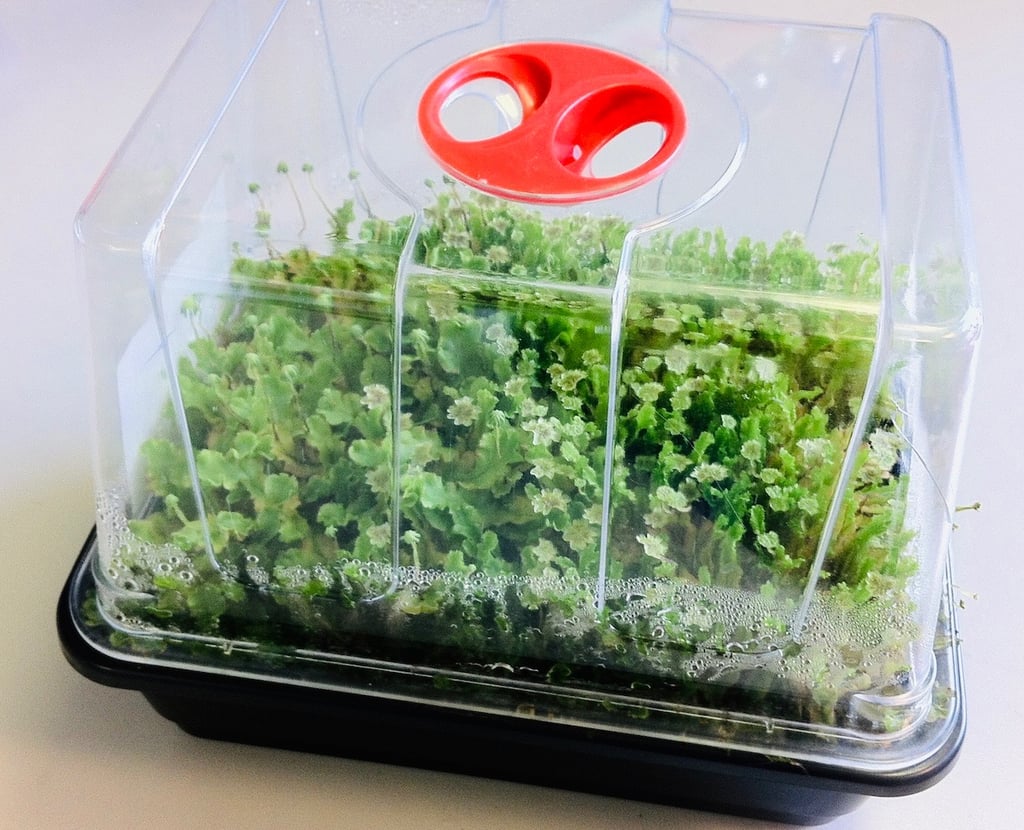
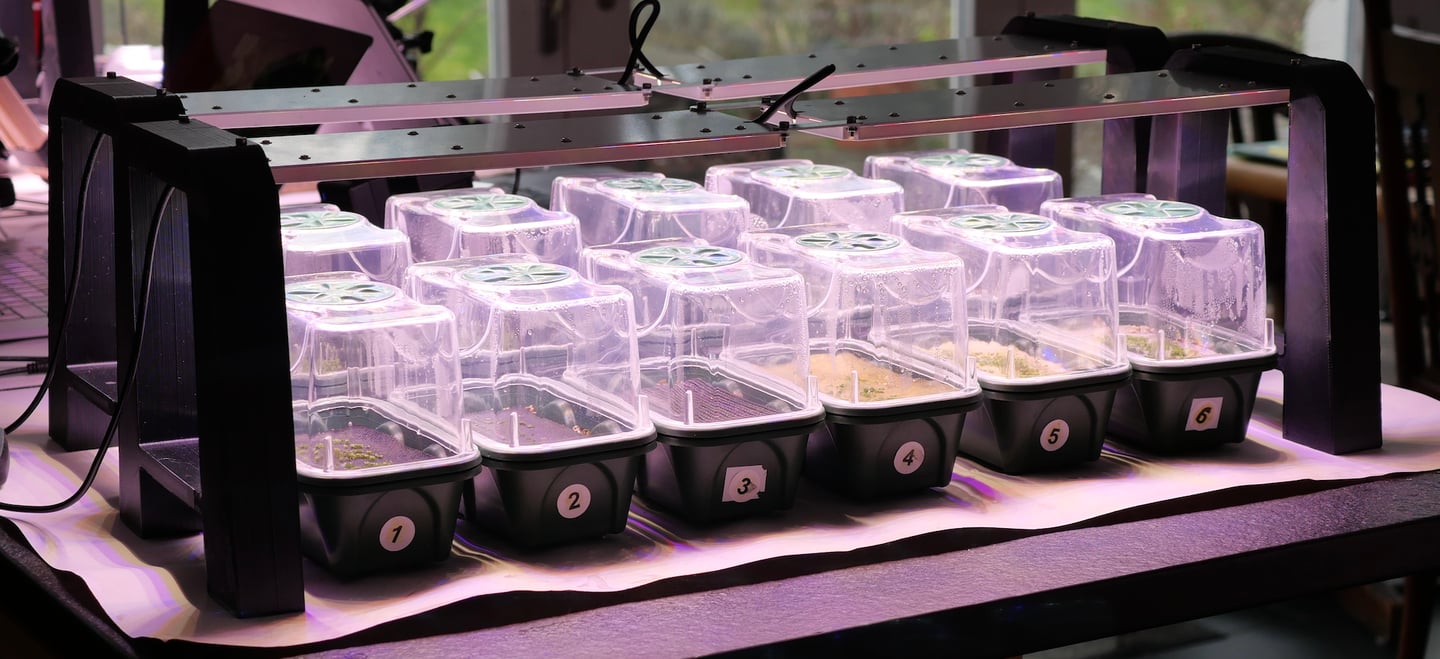
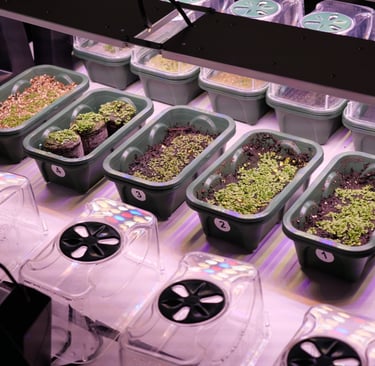
Marchantia polymorpha is a weed, and the plants are very easy to grow under well hydrated, nutrient-rich conditions. We have experimented with a number of substrates and setups - focusing on rapid growth and convenience . We have used Jiffy-7 pots, which are supplied as compressed dried peat, and expand on watering. These are compact for storage, and avoid the need to have bags of soil or other media around - especially if you only want to grow plants on a small-scale. The use of peat pots also helps dodge other problems found with soil-based growth of plants due to pathogens or pests. Marchantia prefer damp conditions for growth, and we grew them in small plastic propagators.
A piece of capillary matting is laid on the base of each propagator tray, and this is covered with dry peat pots. The pots are soaked to allow them to hydrate, and expand to several times their original size. After soaking, small pieces of thallus are planted on the surface of the peat pots, the tray is covered with the transparent propagator lid, and returned to the incubator for growth. The top vent of the propagator lid is left open, and a small space left between base and lid to avoid the build up of excess humidity, which can lead to problems with fungal growth. We use commercial pre-mixed hydroponic nutrient solutions to water the plants. Marchantia plants were then grown in the propagators under LED illumination.


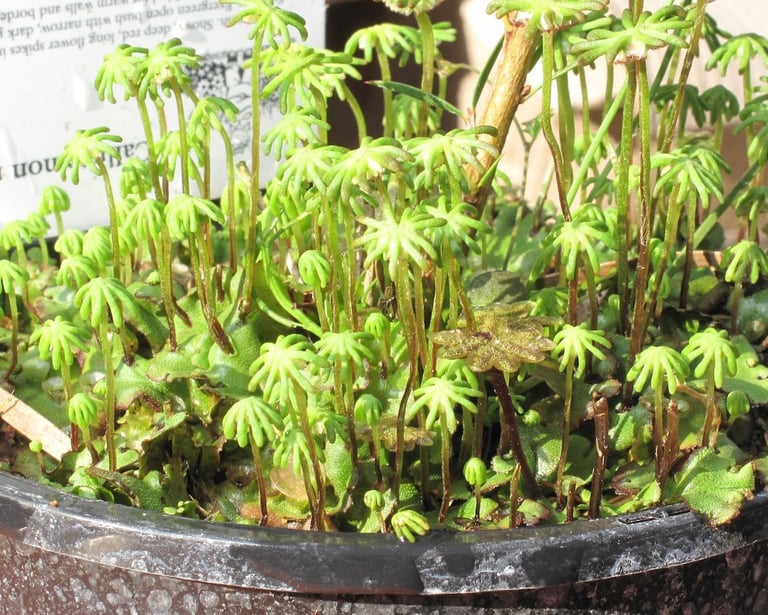
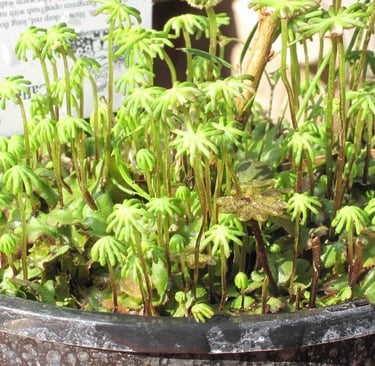
Takayuki Kohchi and Kimi Ishizaki (2011)
Original source of Cam-1 and Cam-2 isolates, from a plant nursery near Cambridge, UK
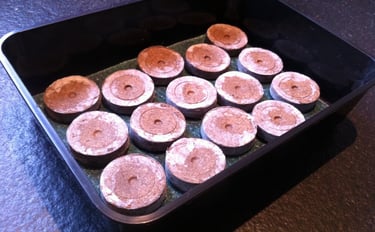
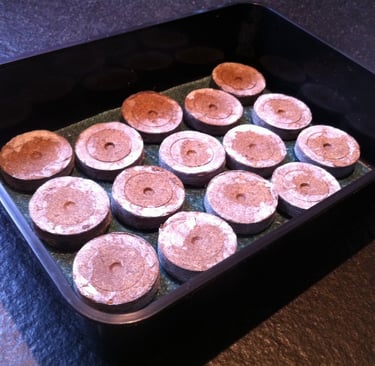
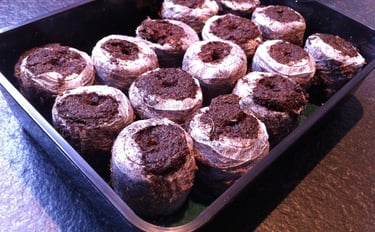
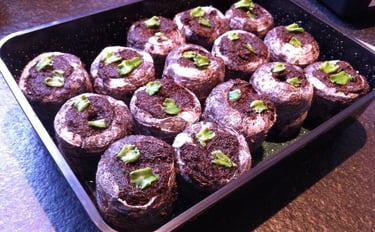
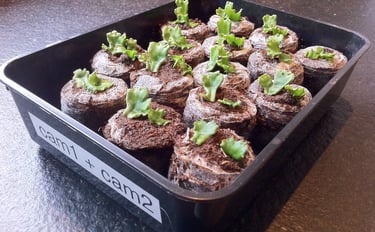
Hydration of Jiffy 7 peat pellets and planting of Marchantia thallus pieces in propagator bases.
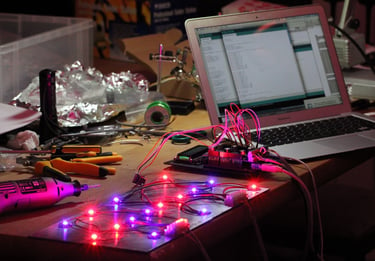
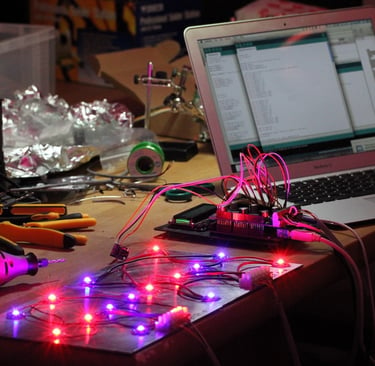
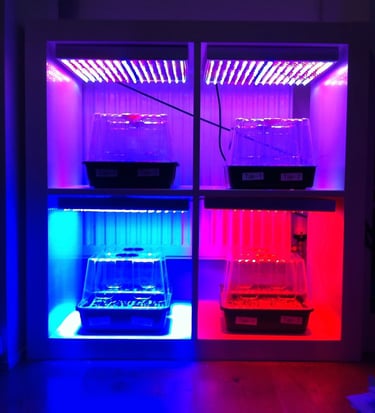
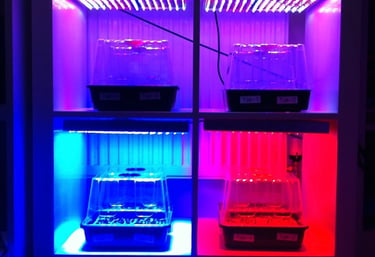
Building homemade LED illuminators with blue, red and far-red LEDs for cultivation of plants.
Testing other solid media
The use of solid media for plant propagation has the appeal of simplicity and scaleability, and I rested a number of alternative substrates. For example, I germinated gemmae on a variety of nutrient-fortified composts and vermiculite to compare these with the Jiffy 7 peat pots. I used media in Easy Grow mini propagators - with a drilled container inserted into intact base, as container for sub-irrigation. The base contained held a soaked piece of 13cm x 7cm water matting as a reservoir. Plants were grown under LED panels at ~150µmol/sec/m2 PPFD.
Jiffy 7 peat disks and BioBizz compost mixes outperformed the other substrates. Good drainage and oxygenation appeared to play important roles in growth. The vermiculite media became sodden with sub-irrigation, and performed relatively poorly. All media contained included fertiliser additives, and hydroponic nutrient was added to the vermiculite. Unfortunately, the Jiffy7 disks and BioBizz compost which supported the best plant growth also showed first signs of algal growth. The two main issues the cropped up were (i) excessive algal growth, which outpaced the plants, and (ii) problems with cleanly harvesting Marchantia, with their prostrate growth habit, from a friable wet substrate. The latter may not be so problematic for spore production, where sporangiophores are elevated from the substrate, but can make harvesting of vegetative material difficult. I also tested the use of surface meshes, in case these would enable simple pull-away collection of mature plants after propagation on solid media.
Click here to download a more comprehensive description of the trials with different solid media.
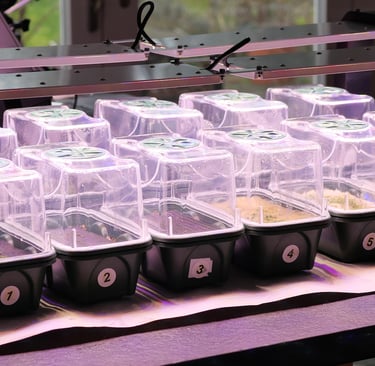
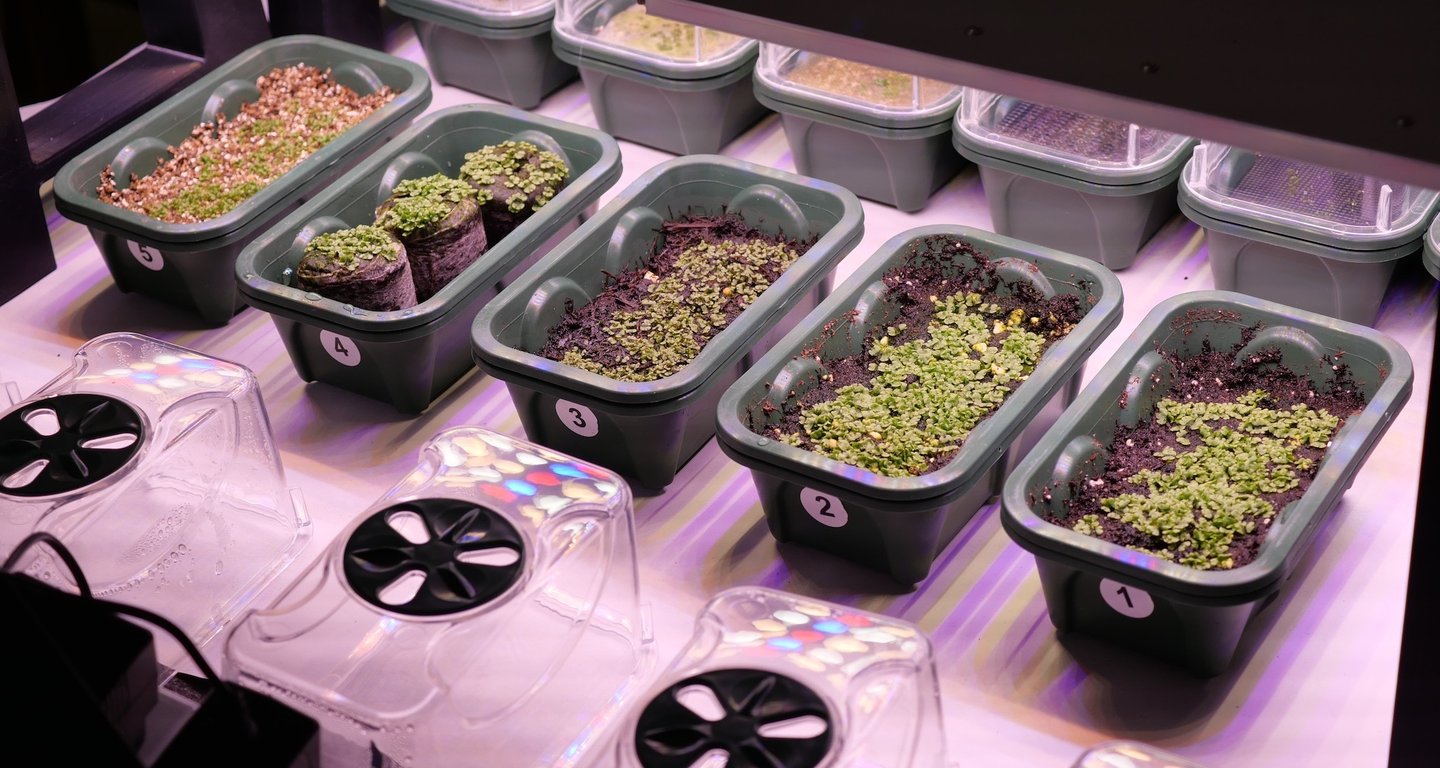
Mesh covering for harvesting from solid media.
Early Grow mini propagators were prepared with layers of (I) capillary matting, (ii) vermiculite and (iii) various type of mesh covering (and control without). The filled propagators were soaked with 250mL prepared Samurai Grow hydroponics nutrient medium., and sub-irrigation containers were partly drained, before being seeded with gemmae, covered with lids with open vents and placed under LED panels as above.
The different screens consisted of:
(0) Control, no mesh (image shown, right)
(1) Weedban50
(2) Solid plastic narrow mesh (used for embroidery)
(3) Plastic wide mesh (used also for hydroponic membrane support)
(4) Nylon mesh (garden mesh for protection of plants from insects/birds)
(5) Spreader mat
(6) Stainless steel (100 mesh)
Observations:
1. Stainless steel mesh performed very well - gemmae were all captured on the upper surface, and grew well in contact with the vermiculite and nutrient medium. The mesh is ~100 per cm - close to 100µm gaps in the mesh - likely a good dimension to allow good support for the seeding propagules, and allow direct penetration of rhizoids. The stainless steel mesh is relatively expensive, and more difficult to work with - i.e sharp cut edges and tendency to warp.
2. Weedban50 performed adequately, but plants grew slower than the control.
3. The narrow solid plastic sheet captured gemmae well on seeding, but the grew erratically, and many died.
4. The more open plastic mesh and nylon netting allowed gemmae to fall through the openings, so saw plans growing under the mesh - not ideal.
5. The spreader mat trapped the gemmae on the surface of the medium, but the plants looked water-logged and grew slowly. Algal contamination appeared quickly on this layer.
Overall, there may be something to follow up here in the future, but little immediate benefit for harvesting. The Weedban 50 material was explored further as a material for surface growth of Marchantia - ironic. as it is marketed as a landscape cloth for inhibiting weed growth, albeit from underneath.
Click here to download a more comprehensive description of the trials with mesh coverings.
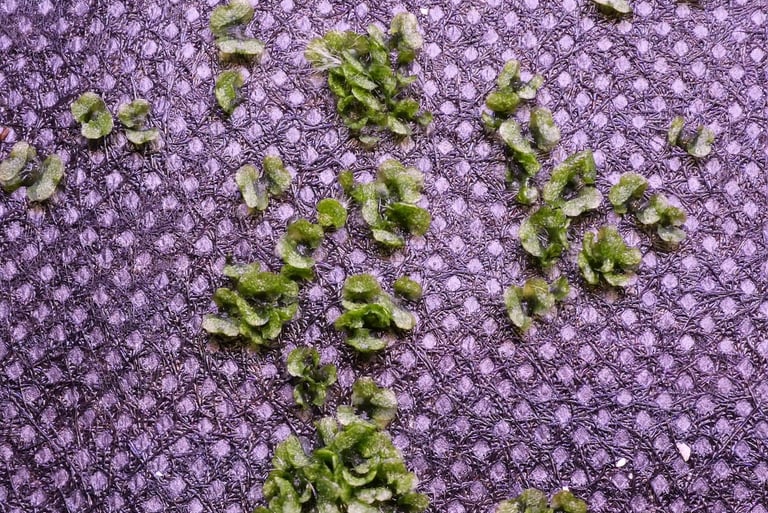
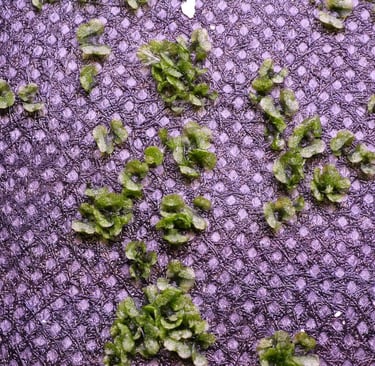
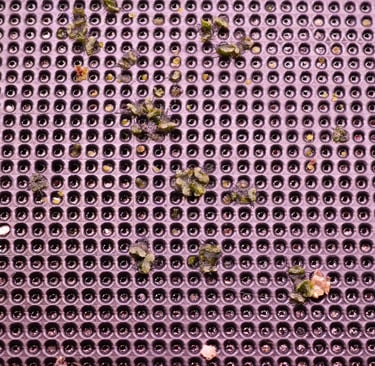
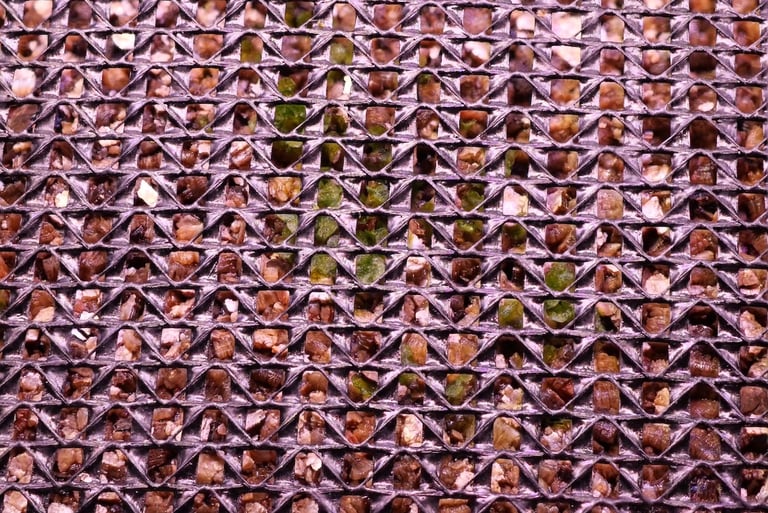
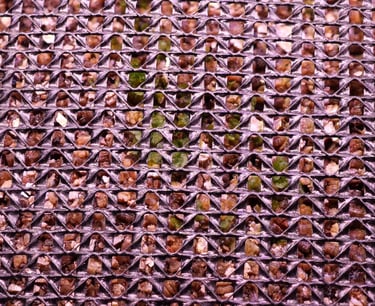
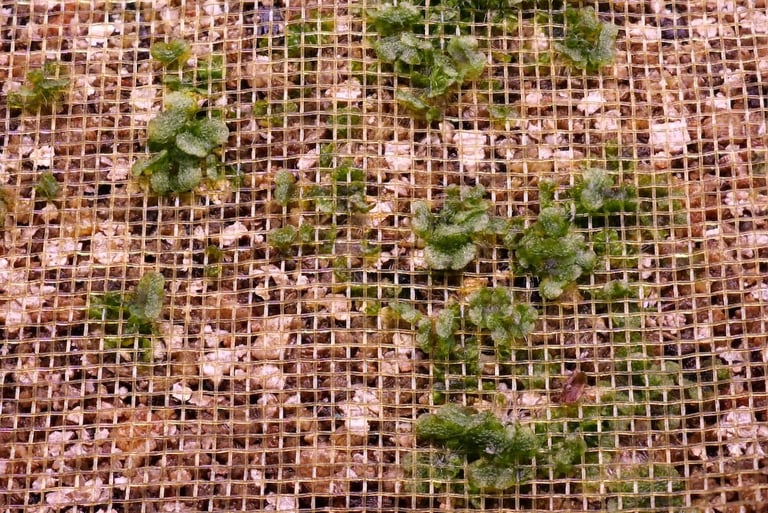
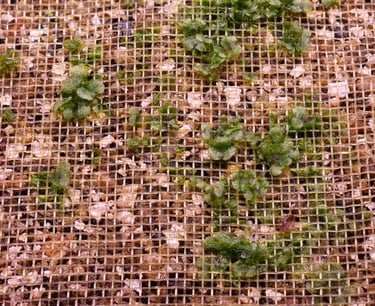
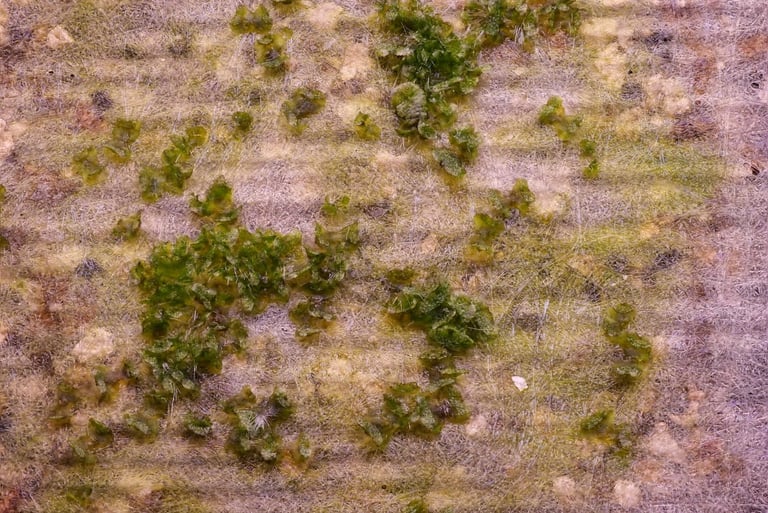
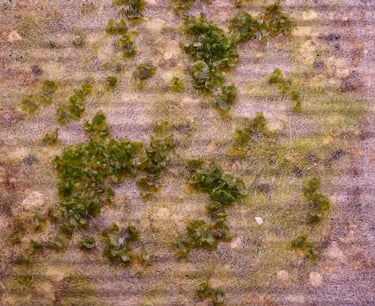
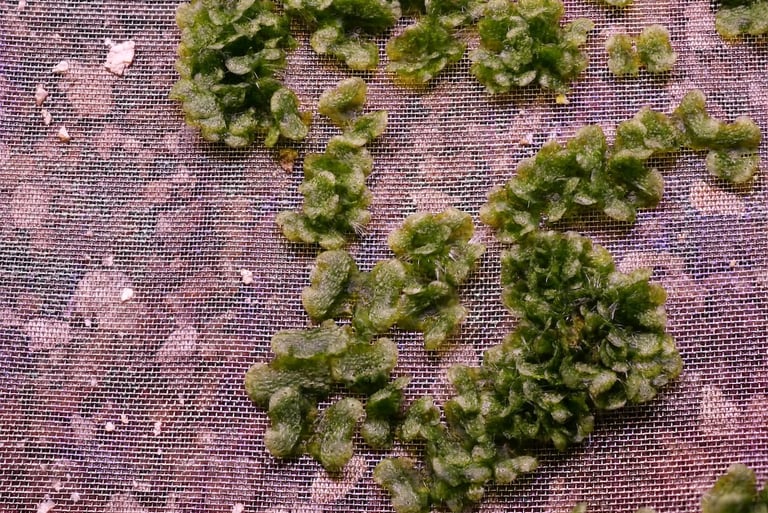
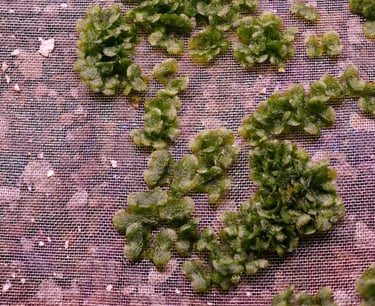
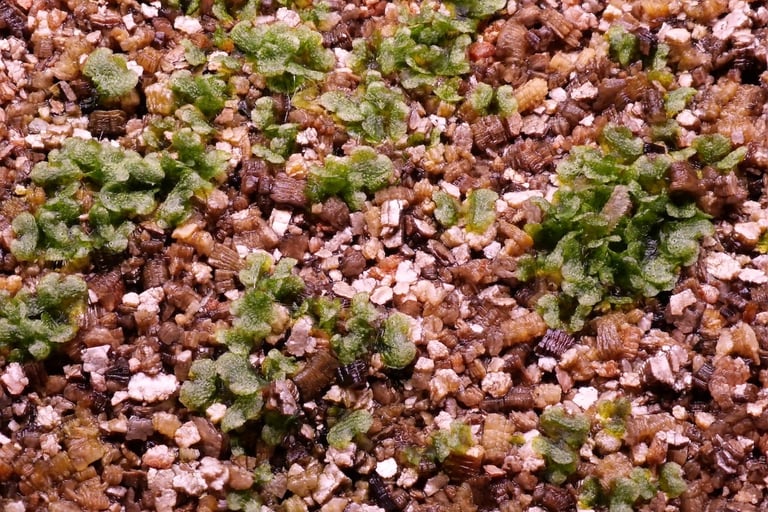
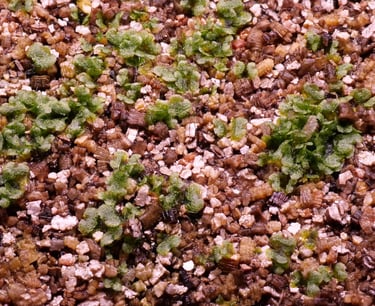
Weedban 50
Embroidery mesh
Plastic wide mesh
Nylon garden mesh
Spreader mat
Stainless steel mesh
Hydroponic techniques
Historically, hydroponic techniques have produced high growth rates for plant production and I wished to explore these for Marchantia propagation. However the growth habit of Marchantia produces some immediate constraints. Most hydroponic techniques are designed with seed plants in mind, where 'proper' shoot systems are held in place by some framework, and root systems are exposed to nutrient delivery, which might be deep water immersion, a series of flood and drain events, spray, fog or film. The prostrate habit of Marchantia means that plants should be planted on a substrate that allows anchoring by the rhizoids that grow from the ventral side of the thallus, and that the plants are exposed to nutrient either by flow through a porous substrate, or that rhizoids contact a stream of nutrient after growing through a substrate. Alternatively, nutrient might be delivered to the plants via foliar spray or fog, but algal overgrowth is a major problem to be contended with.
Aeroponic trials
In order to test the delivery of nutrient to Marchantia by spray or fog, I based the construction of systems around X-Stream 20-slot Aeroponic Propagators (dimensions: L 46cm x W 39cm x H 40cm, tank size: 8 litre). The propagators have an option for mounting 2x 30cm Sunblaster fluorescent tube lights - but the specifications looked less than ideal - with prominent non-photosynthetically active spectral components, and poor in red wavelengths, so I decided to make custom holders for the 'standard' Aliexpress-sourced LED panels that had already worked well for Marchantia in NFT hydroponics. The top plates of these aeroponics units are intended for use with conventional plants, with either cups or collars used to support shoot pieces for inducing roots. I purchased a packet of high-density plastic filter grids (680mm x 400mm), which could be cut to size an provide a flat support for the growing surface, and allow access by mist or spray from below to feed support membranes for Marchantia.
The X-Stream systems are supplied with a substantial pump and spray device which is positioned inside the nutrient tank and fills the space under the support platform with a high velocity spray. The system is intended for plant propagation, and normally cuttings are suspended in the spray tank, where the delivery of aerated nutrients encourages fast regeneration of root systems. For Marchantia, I wanted to test whether the spray environment would be helpful for nutrient delivery and where emerging rhizoids might have efficient access to highly aerated nutrient. Photos of the system are shown below. Several things became apparent. (i) The continual running of the large pump (required to generate the fine spray) resulted in heating of the nutrient media. Even when the ambient temperature was around 15ºC, media temperatures reached 26ºC, not ideal for Marchantia. (ii) The vigorous sprays generated in the X-Stream vessels were damaging to fine, unsupported rhizoids growing down from the support membrane. Rhizoids survived where they were shielded from the direct effects of the spray within the underpinning grid, but were subject to shearing as they grew longer. (iii) Overall growth of the Marchantia plants was slow - see the image below of gemmalings after 2 weeks. Given these problems, I considered the approaches of high pressure aeroponics (HPA) or fogponics. HPA uses intermittent bursts of atomised nutrient solution using 80-100 psi pressures and fine nozzles to produce micro-droplets below 50µm in size. However the systems are technically more difficult to maintain and prone to blockage, etc. An alternative is to use ultrasound generated nutrient fogs (see below).
Click here to download a more comprehensive description of the Aeroponic trials.
The X-Stream vessels themselves were a discovery - they were well constructed, with strong double-walled bases and lids with good geometry for light support, available in a wide range of larger sizes, accessible and reasonably priced. In particular the 40 site vessels have proved to be useful for larger scale propagation without being too unwieldy or heavy when full. See an example here.
X-Stream vessels
20 site propagator: dimensions: L 46cm x W 39cm x H 40cm, Tank Size: 8 litre, Lid 41cm x 34cm x 19cm
40 site propagator: dimensions: L 60cm x W 41cm x H 41cm, Tank Size: 14 litres, Lid 56cm x 37.5cm x 19cm
80 site propagator: dimensions: L 76cm x W 61cm x H 41cm, Tank Size: 25 litres, Lid 72cm x 57cm x 23cm
120 site propagator: dimensions: L 120cm x W 68cm x H 47cm, Tank Size: 40 litres, Lid 106.5cm x 59cm x 23cm
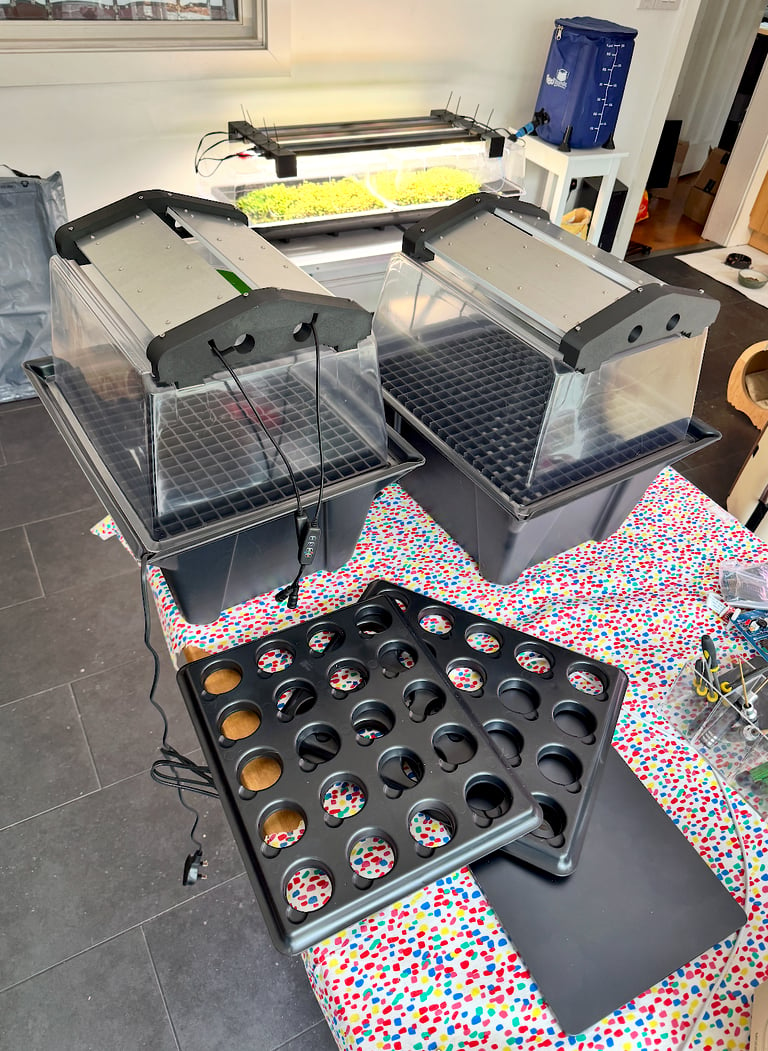
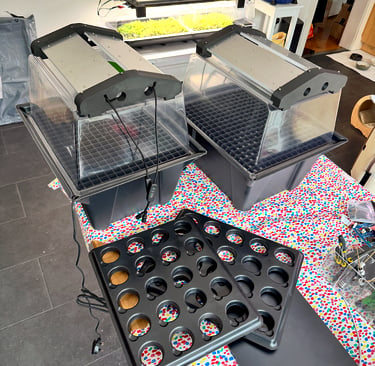
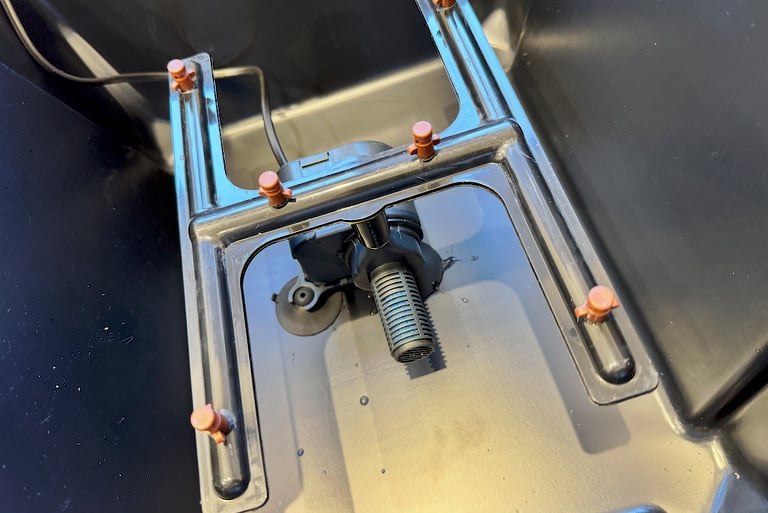
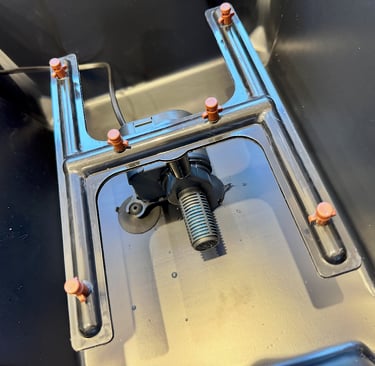
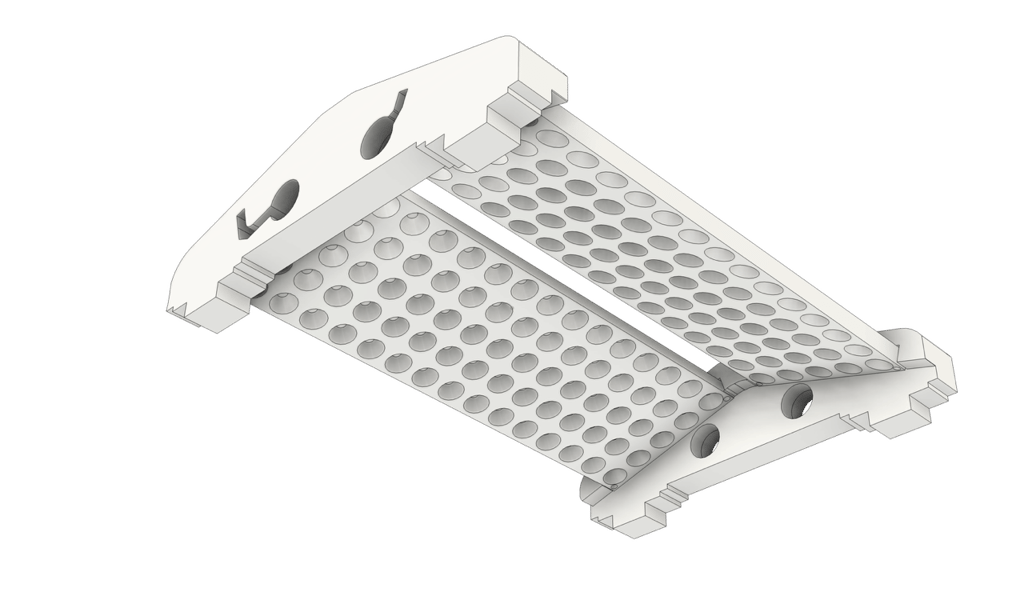
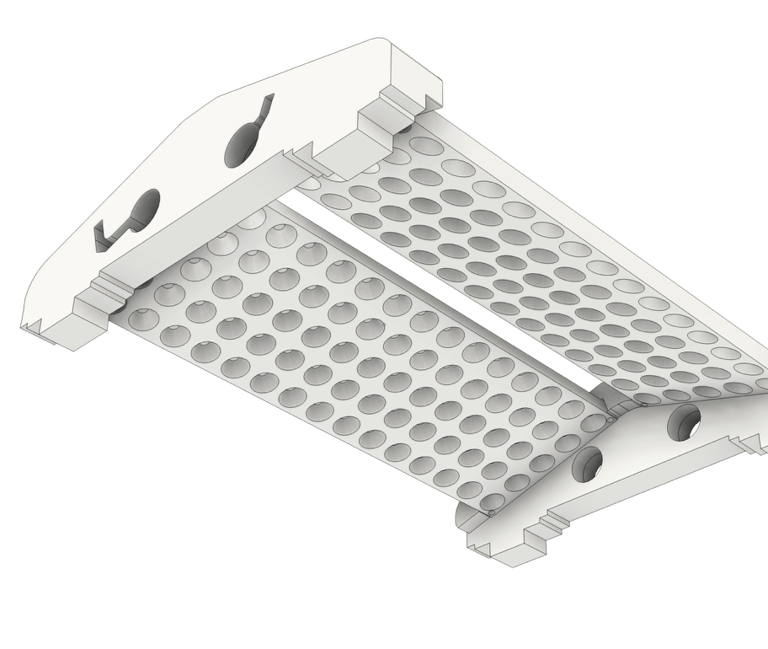
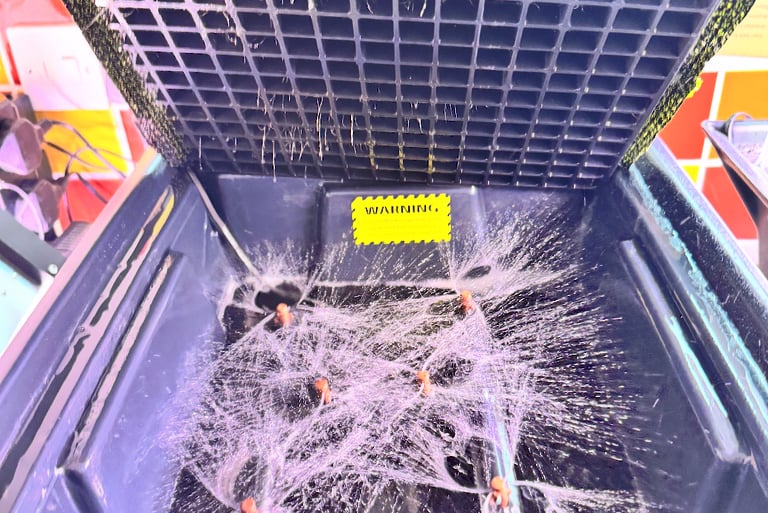
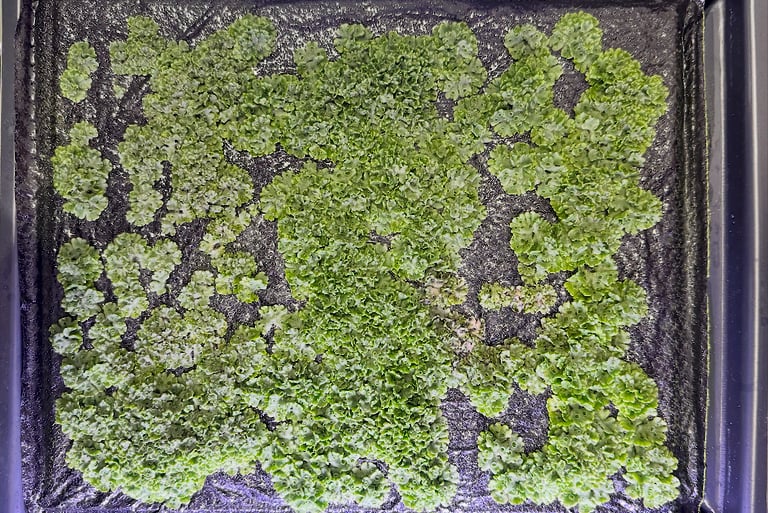
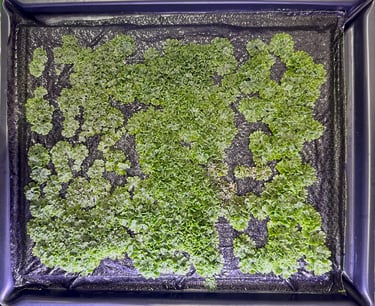
20 site X-Stream propagators converted for spray aeroponic trials of Marchantia growth on hybrid membranes.
Fogponic trials
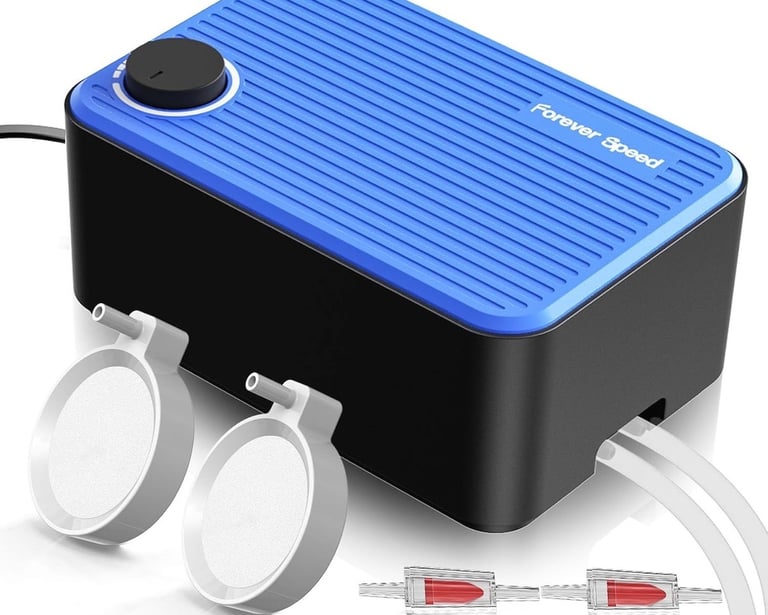
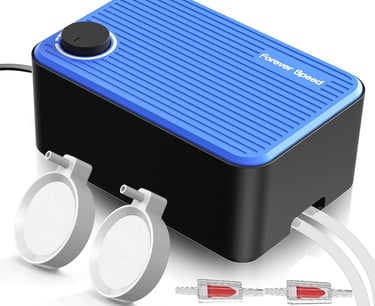
The aeroponic vessels were progressively upgraded to remove the spray system and replace this with ultrasonic foggers, and add an aeration system for the media. A 3-transducer ultrasonic fogger, float and power supply was purchased from Amazon (~£30). Matt black paint was used to block the ornamental LEDs on the device, to minimise emission of stray light in the tank. A splash guard for the ultrasonic transducer was designed in Fusion360 and printed in Greentec Pro carbon fibre filament. The splash guard slotted into the flotation device, and protected the underside of plant membrane support from water droplets propelled upwards from the fogger device. The fogger was initially operated with a 20sec ON, 5min OFF duty cycle (based on published suggestions). The light duty cycle helps with maintaining a lower temperature for the media, and letting nutrient drain from the rhizoids, and help avoid asphyxiation. An 8W air pump was added to aerate the systems - with airlines split between two tanks, and feeding “nano” airstones. The pump was run continuously.
Initial trials showed that the media tank temperatures dropped to close to ambient temperatures in the modified fogponic systems (compared to the aeroponic systems). However despite prolific fog and increasing the duty cycle for production, the membranes and plants were not wet as efficiently as expected by the 'dry' fog - which might be related to the droplet size and wetting ability.
The system was adjusted to include a small 'aquarium cooling' fan that was positioned to blow air under the plant support and lift fog into the upper compartment, which would then settle as the duty cycle switched. An electronic timer was used to control the fan and fogger. The intention was to test whether dual 'blanket' delivery of nutrient fog to exposed thalli and rhizoids might improve wetting and growth. Compared to aeroponic spray systems, the switch to ultrasonic generated fog improved growth of rhizoids into the tank, however growth of the plants still lagged behind that of plants with more direct access to water and nutrients. Images of 2 week old transplants are shown below.
On the basis of these trials, I reverted to the approach of using nutrient film technique (NFT), and optimising this for Marchantia.
Click here to download a more comprehensive description of the Fogponic trials.
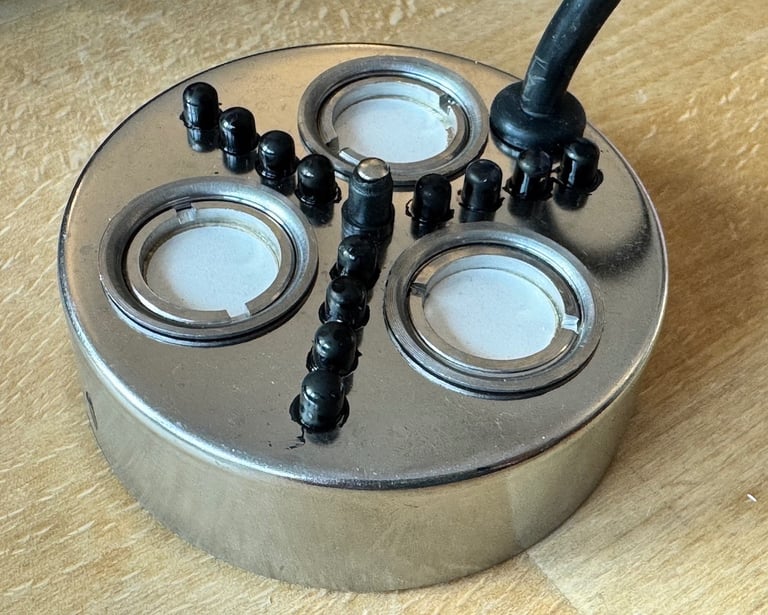
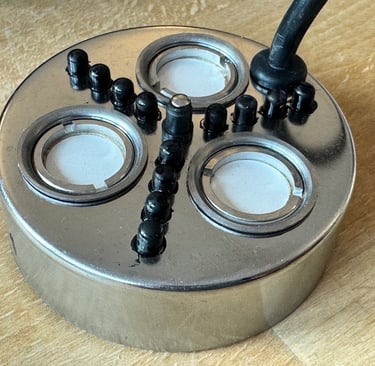
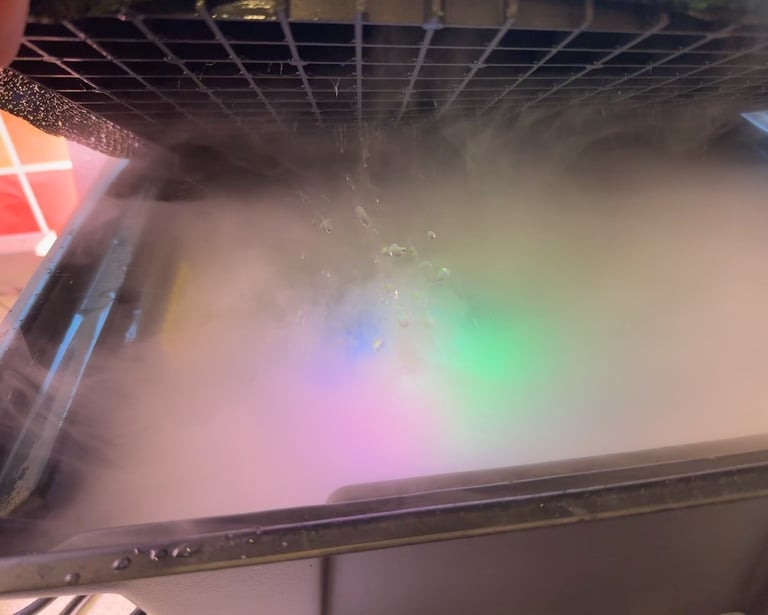
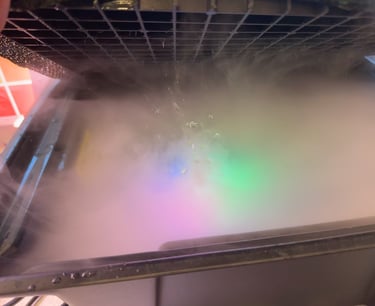
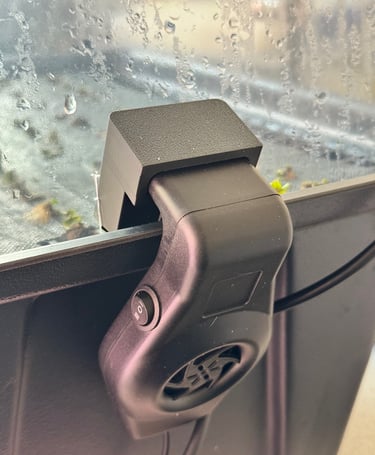
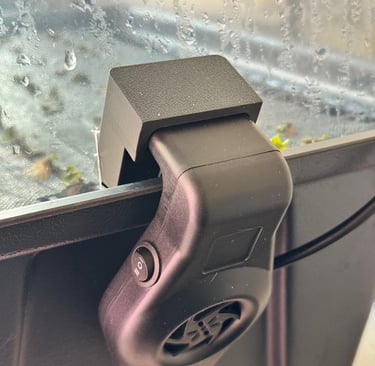
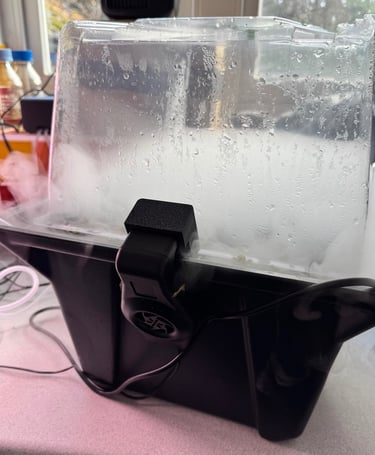
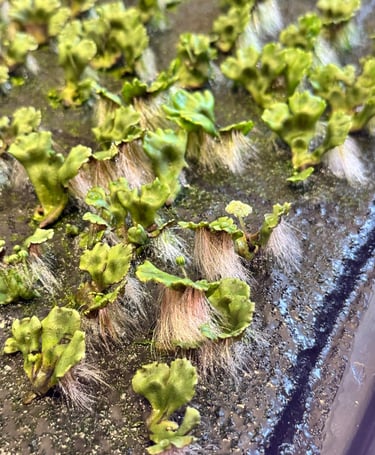
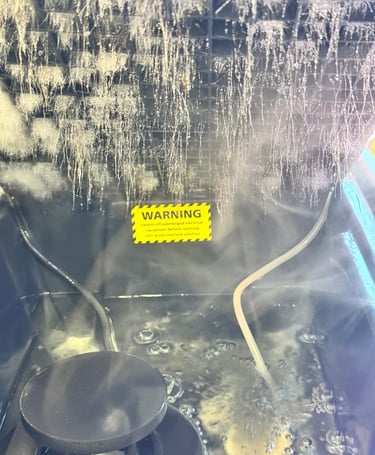
20 site X-Stream propagators converted for fogponic trials of Marchantia growth on hybrid membranes.
Support membranes for NFT Hydroponics
In order to explore prospects for hydroponic cultivation of Marchantia, a critical task has been to identify a substrate that (i) physically supports the plants, (ii) keeps nutrient media away from the surface to minimise growth of contaminating algae, (iii) acts as a wick to feed nutrient solution to young plants and (iv) allows rhizoids to grow through the substrate into an efficient feeding zone. I have tested a variety of materials, and so far the best solutions have come from combining materials to create specialised hybrid support membranes.
The first part of the development work was to grow Marchantia directly on a combination of different sub-irrigated porous substrates. These include the following, listed with general notes:
Spreader mat - a white cloth made of finely layered hydrophilic fibres. Widely widely used in NFT hydroponic systems to break surface tension and ensure even spread of liquid across the base of trays or channels. The cloth doesn't block light. It is usually used inside an NFT hydroponic system. When used exposed to nutrient and light i.e. for direct support of Marchantia plants, algal growth becomes a major problem. However can be used under a light-blocking layer to facilitate nutrient distribution.
Water matting - 3/8 inch (9mm) thick with a high water holding capacity - it can hold 5 or more litres per square metre. It is often sold as a water retaining layer for greenhouse benches, and can be used as a replacement for sand and gravel drainage aids. Described as a chemically bonded non-woven material with some retarding effect on the growth of algae. Has a weaker capillary action than thinner, specialised capillary mats, but higher water holding capacity. Plants grown directly on the surface suffered from water-logging, especially gemmalings.
Weedban 50 - a spin-bonded membrane which is air and water permeable. It is used in landscaping to suppress weeds, covering an area and being covered by mulch or soil. The material is slightly hydrophobic, but can be laid over a support mesh, sub-irrigated, and will support Marchantia growth. Rhizoids will penetrate the cloth and can be an effective surface membrane. However, if water is on the surface through spillover or penetration, algae will proliferate.
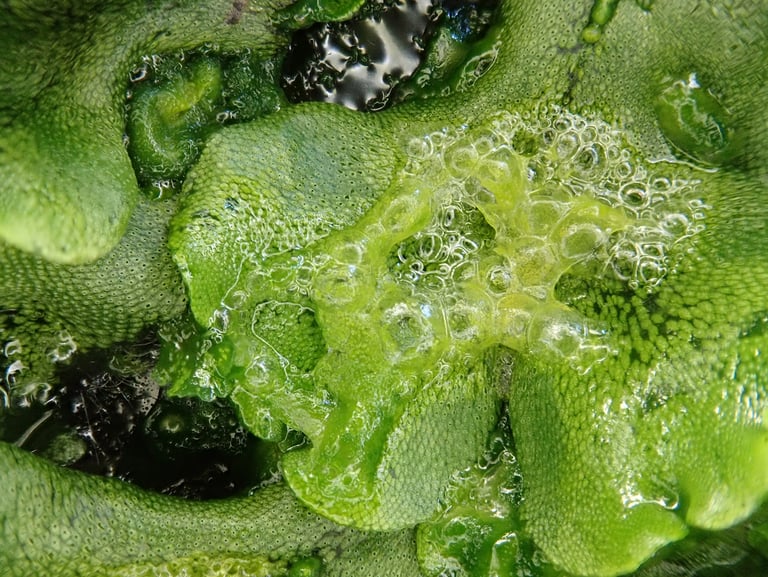
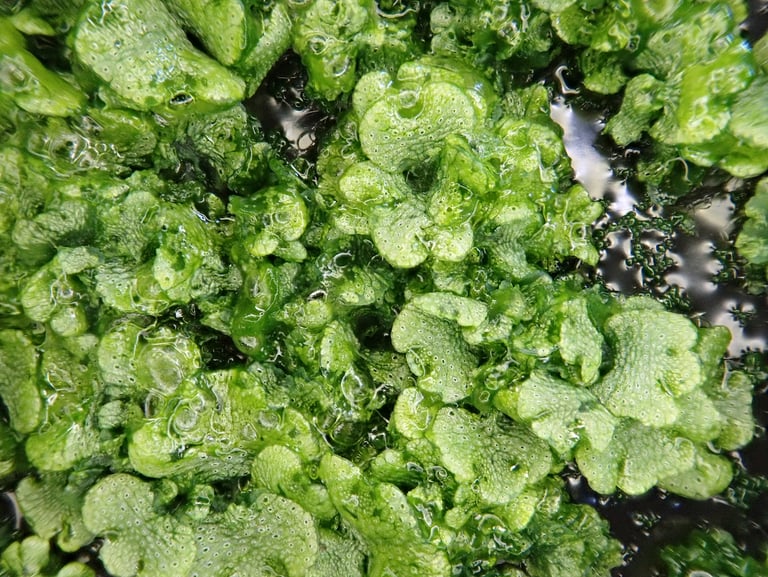
Capillary matting - Various type of capillary mats are available. Most are supplied as the porous mat alone, sometimes even light coloured, which can provide conditions for algal overgrowth. Henofa are a specialist manufacturer that provides capillary matting of different types that can also include a bonded plastic film that is impermeable except for high density microperforations (see below). I can highly recommend the Henofa Klavermat 300+BF (3.2L/m2 water holding capacity). However, it is not widely distributed and a substitute might be made from standard capillary matting, if overlaid with perforated black plastic film, or Weedban 50. The key to use of any of these support layers is to avoid surface water on any illuminated growing surface - which will promote algal growth within a week or two. Below: examples of algal overgrowth on gemmalings (left) and thalli (right)
Perforated films for NFT hydroponic culture of Marchantia
I have tested a number of potential substrates for supporting Marchantia growth and the current favoured solution uses 3D printed trays with 20mm high support pegs to support: (i) a layer of heavy duty 220gsm black PVC mesh (available from Amazon in 2m width, £8.99/m). This provides a layer of support to stop any sagging, used in all of our NFT hydroponic designs. (ii) A dual layer of Henofa Klavermat 300 capillary matting covered with an attached surface layer of 30µm thick micro-perforated black plastic film. The Klavermat 300 + BF is available directly from Henofa, a specialist manufacturer of capillary matting based in The Netherlands (Download a specification sheet).
The Klavermat 300 + BF material has two important features - the capillary matting is black, light-shielding, and is highly efficient at drawing up water. Second, the attached micro perforated film has extensive and very fine (sub-millimetre) perforations. A comparison between this and other available perforated plastics is shown below.
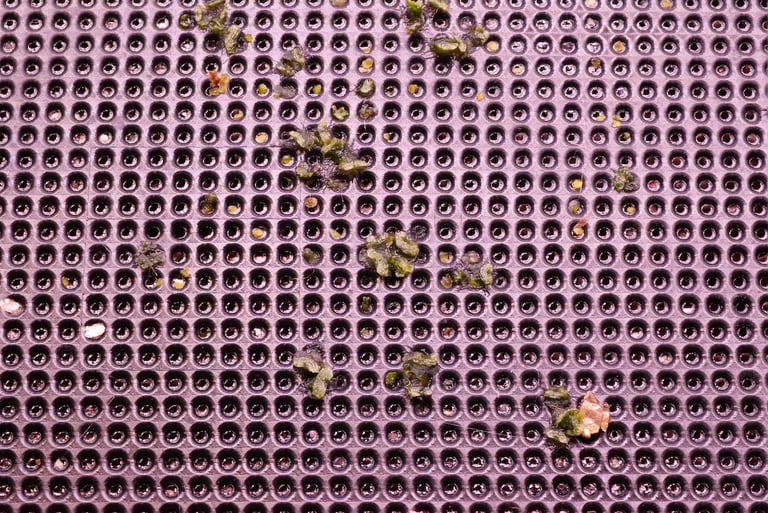
Back illuminated photos taken at the same scale are: (Left) Perforated black polythene with 1cm/1.4cm hole spacing, (Middle) Microperforated Poly Film used as a cover for capillary matting with 0.5cm/0.7cm hole spacing. Works well as a growing surface for thallus pieces - not successful for gemmae, and (Right) Henofa perforated black plastic film (taken from Klavermat 300 BF sheet).
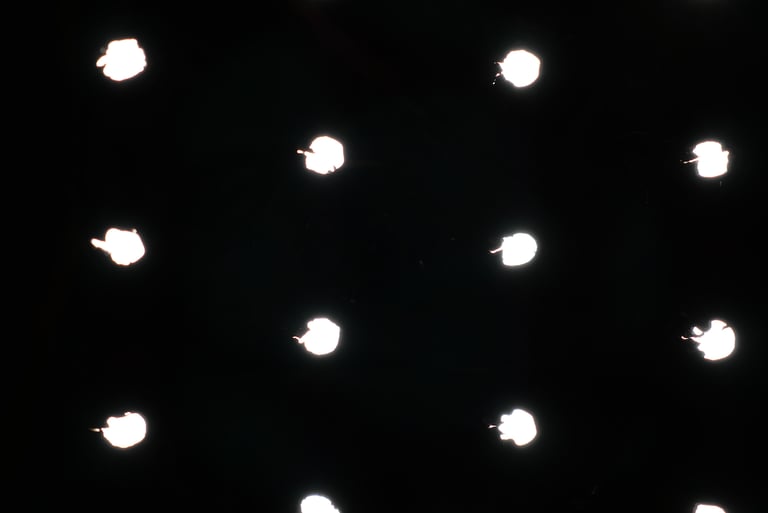
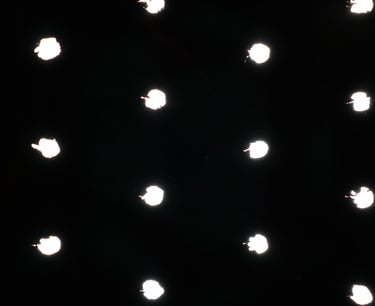
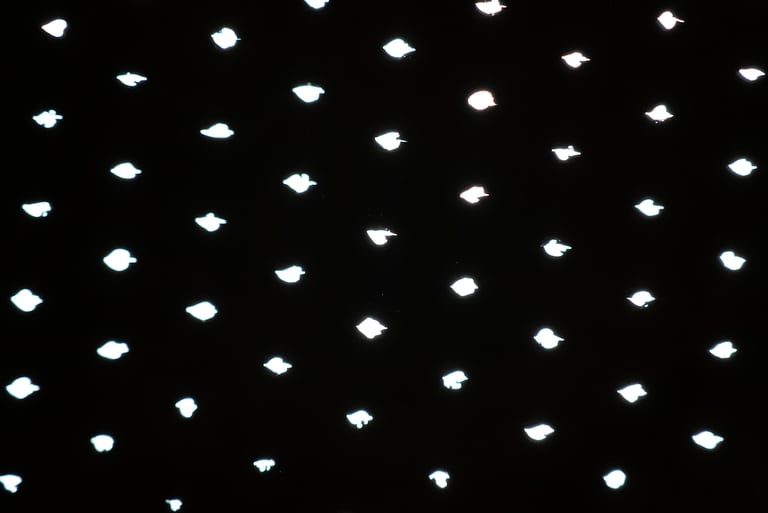
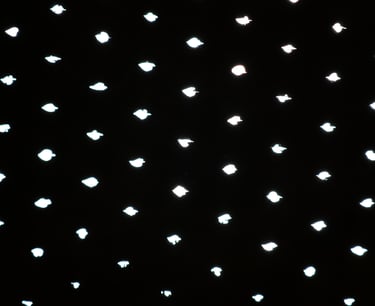
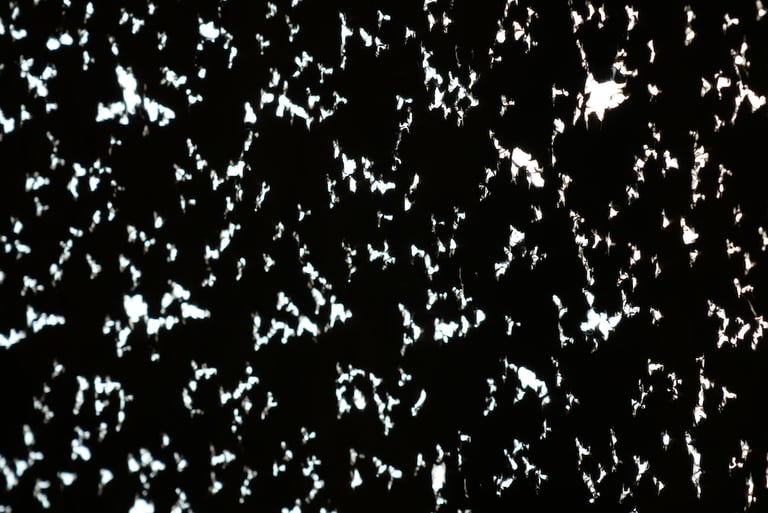

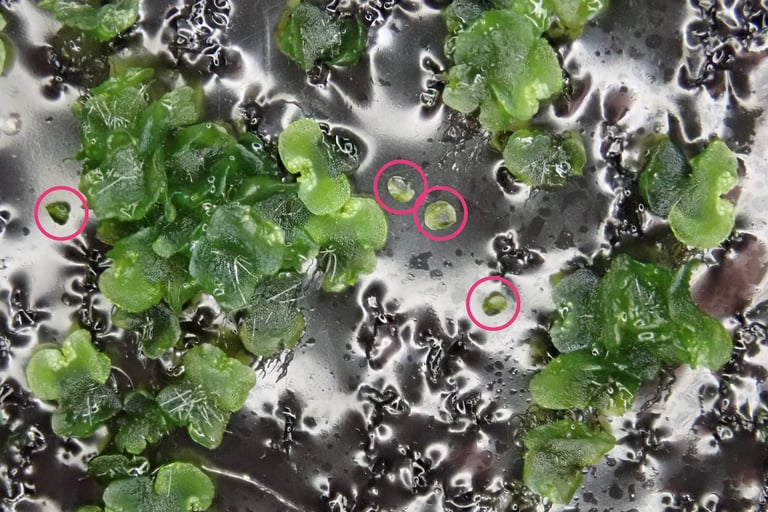
Larger 1cm spaced perforations require individual thallus fragments to be placed directly over a perforation to allow proper feeding and subsequent growth of the plants. The 0.5cm spaced holes allow larger thallus pieces to be distributed randomly over the surface with a good chance of successful growth - however this is not successful with smaller gemmae propagules. In contrast, the micro-perforated Henofa film allows random spreading and placement of thallus or gemmae over the surface with good contact with the capillary matting below. The uninterrupted part of the Henofa film is impermeable, but with so many perforations, water flows directly through these. Marchantia gemmae can be harvested, suspended in water and directly pipetted onto the film surface. As the solution flows quickly through the film, most individual gemma are lodged over holes in the film (see image below, left). If the gemmae are left to grow, the majority of gemmae (~90%) establish themselves and grow rapidly to form large assemblies of thallus. The image below (right) shows the same part of a Henofa-covered NFT hydroponics unit after 3.5 days. Most of the gemmae grew well, at the expected rate - while only four of the gemma in the field of view (circled) did not grow well because they had no contact with the underlying nutrient solution.
The fine and closely spaced perforations in the Henofa film make it a reliable surface for planting Marchantia tissue fragments or gemmae. However note that due to the small size of Marchantia spores, placing a suspension of spores on the film result in the majority of them being swept through the microperforations and end up underneath the film - so not recommended unless some form of encapsulation can be used. In practice, the use of the Henofa film greatly helps reduce problems due to algal growth (especially seen with mats without an impermeable covering) - due to effective permeability and light blocking. Any problems are usually due to over-supply of nutrient solutions, with media being exposed on or across the growing surface.
Click here to download a more comprehensive description of the membrane support trials.
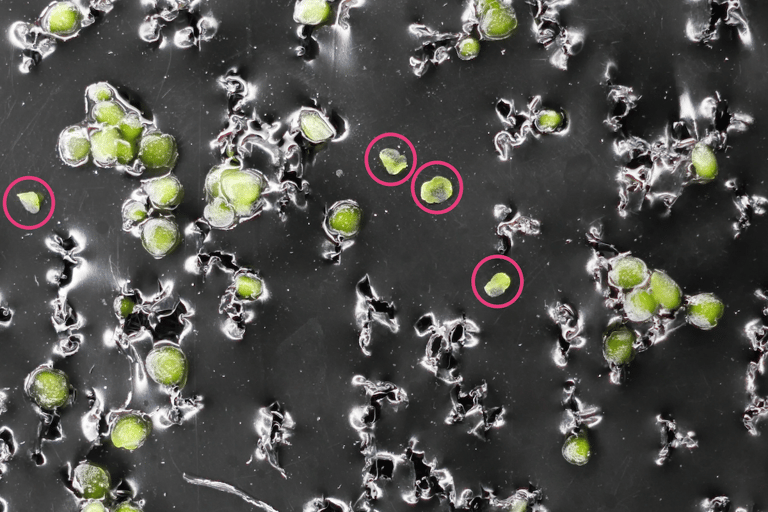
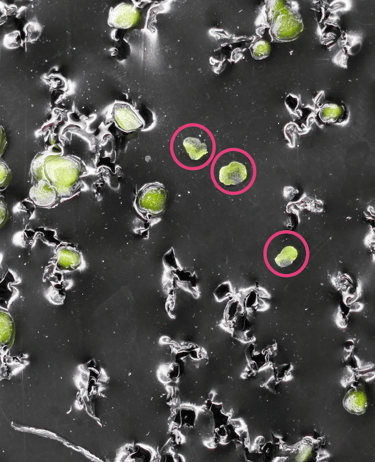
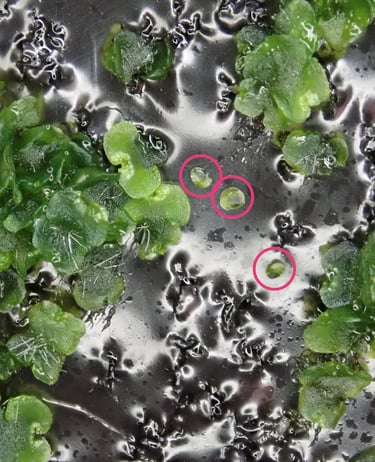
Day 0: Marchantia gemmae distributed on Henofa Klavermat 300 BF surface
Day 3.5: Growth of gemmalings on Henofa Klavermat 300 BF surface, except those circled, which don't have access to a suitable pore in the plastic film
NFT tray design for sub-irrigation
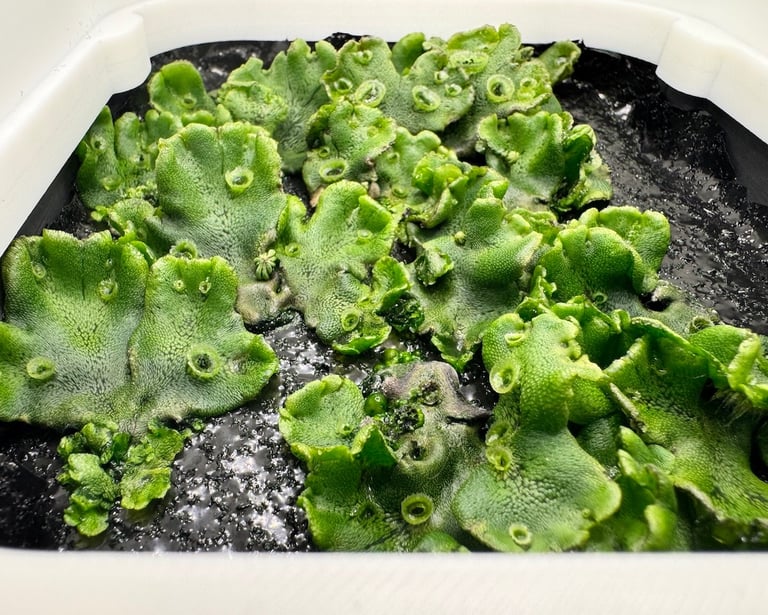
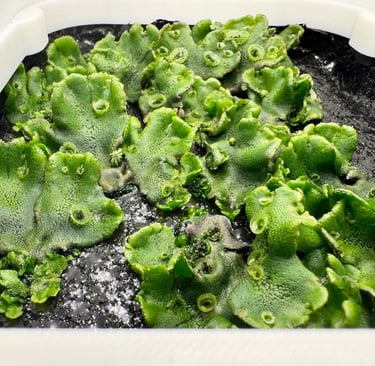
The growing surface is suspended over the NFT tray by a series of pegs, which allow two separate streams of nutrient media - one through the upper layer capillary matting in contact with the plants growing on the surface, and the other flowing over the dam next to the inlet and washing over the bottom surface of the tray, around the pegs. Nutrient in the capillary matting will feed the early stages of growth, before rhizoids have a chance to grow through the mat. As the rhizoids reach into the lower chamber (in a matter of days) they will gain access to the unimpeded media stream running as a film across the tray. It is possible that the depth or volume of these lower chambers will have an impact on the growth of the plants in this system, and I tested this by 3D printing series of vessels that differed only in the depth of the support pegs - with 1.0cm, 1.5cm, 2.0cm and 2.5cm examples shown below. Shallow pegs (0.5cm and 1.0cm) showed poorer rates of growth - perhaps due to water-logging and poorer aeration. Of the deeper pegs, 2.0cm deep seemed optimal and this was adopted across the different scaled NFT trays. The media flow is affected by pump settings i.e. rates of flow and/or cycles of switching on/off, this might be something to explore further if aeration is an important factor.
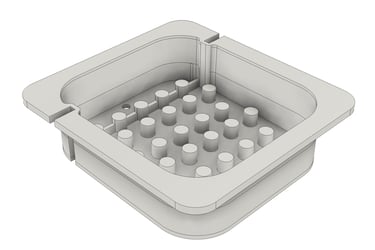
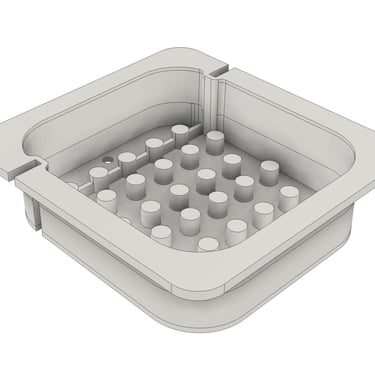
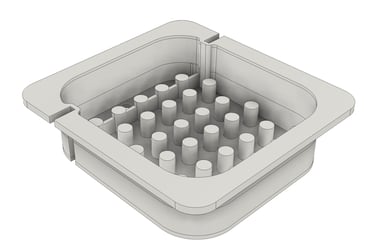
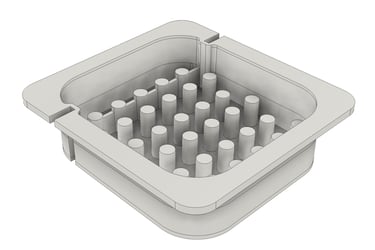
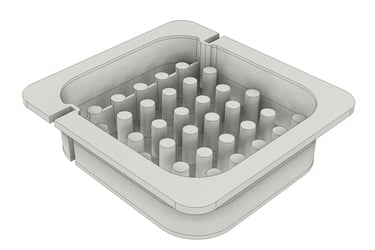
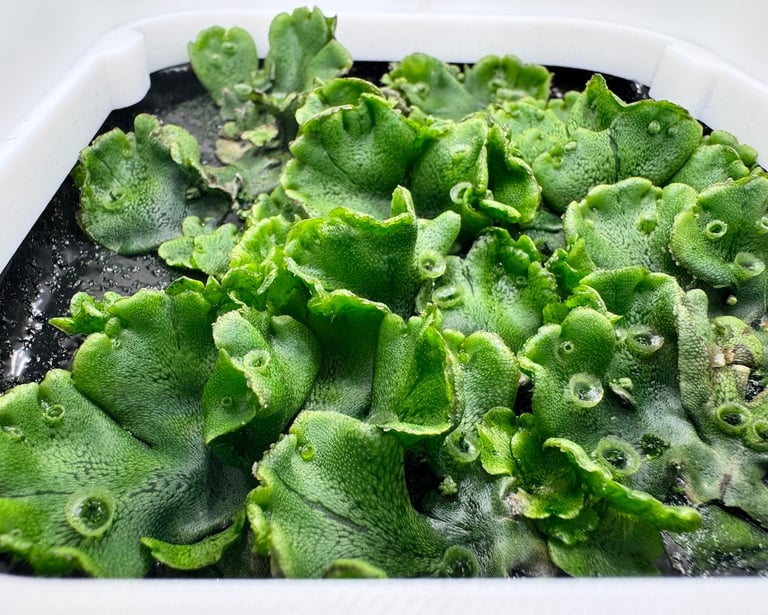
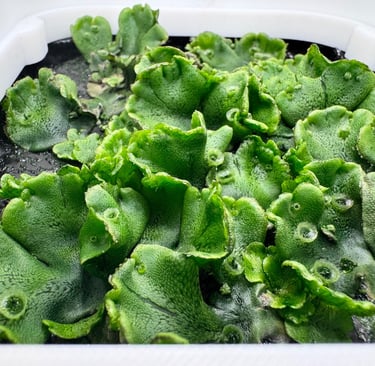
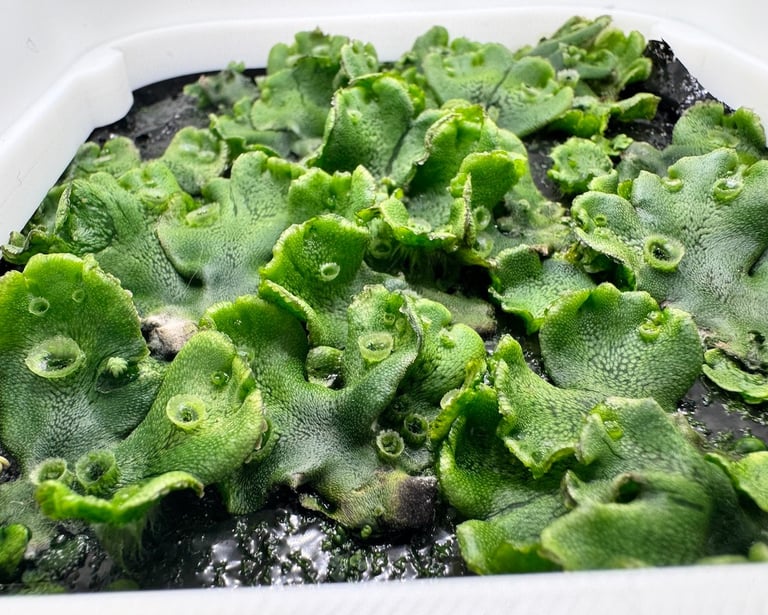
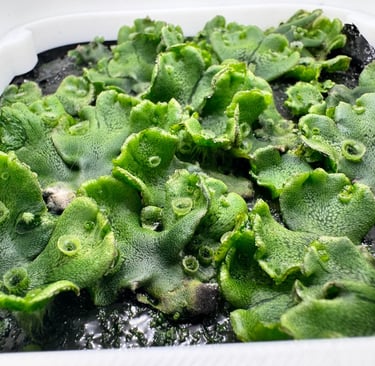
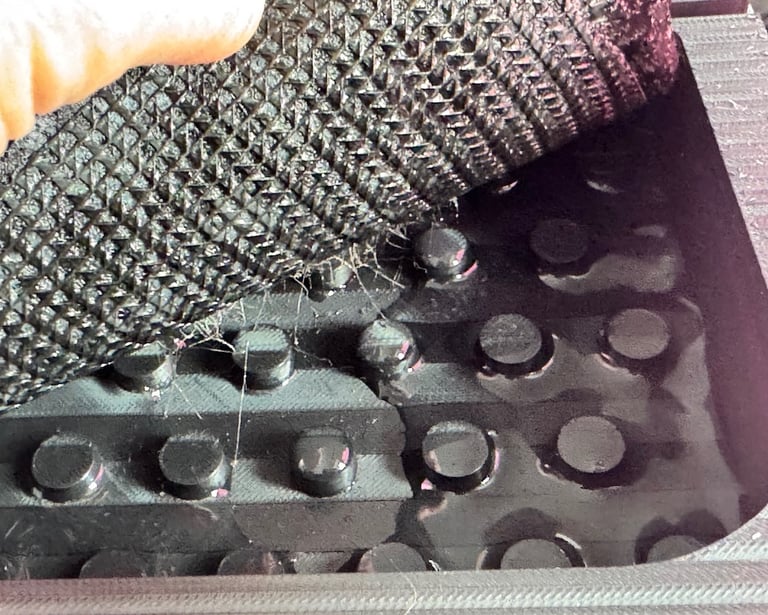
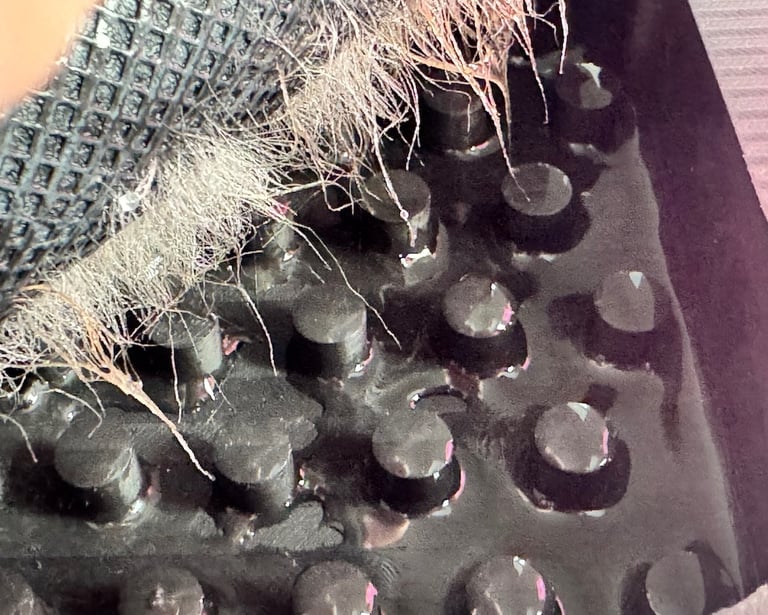
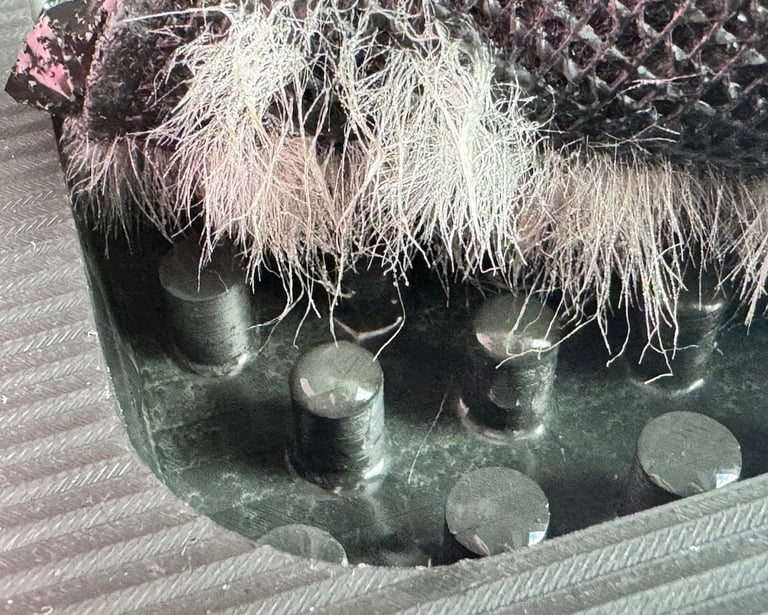
0.5 cm tall support pegs on NFT tray
1.0 cm tall support pegs on NFT tray
1.5cm tall support pegs on NFT tray
Mini-NFT grow-pods showing Marchantia thalli growth after 14 days of culture. The effects of different height support pegs on growth is shown. The lower row of images show the extent of rhizoid growth seen after 14 days, while the row above shows the appearance of thalli on the upper surface of the same trays. The taller support pegs have a clear beneficial effect on rhizoid growth.
Lighting for Marchantia
Of course your plants won't grow well unless they have appropriate lighting. There are three main issues to deal with.
With self-contained growing systems, like the ones described here, the attached lighting should have a low heat output. Generally this means one must use high efficiency LED light sources.
Marchantia has a similar action spectrum to other plants, where mainly blue and red wavelengths are absorbed for photosynthesis. Mixed warm and cool white LEDs work well, while many grow-lights intended for plant work supplement these with additional LEDs that emit blue and red, sometimes with minor contributions in the ultraviolet and far-red wavelengths. Be aware that far-red illumination will promote transition from vegetative growth to the sexual phase in Marchantia, which can be beneficial for spore production.
The intensity of the light shouldn't exceed about 300 µmol/sec/m2 at the plant surface. I use between 150 and 250 µmol/sec/m2. High intensity light can lead to phytotoxic effects, and plants may be more susceptible under some conditions, e.g. for young plants trying to establish themselves or subject other stresses.
It is useful to have access to a light meter when setting up a new lighting system. Meters which provide a readout of PPFD (Photosynthetic Photon Flux Density) must take into account the spectral properties of the light - effectively measuring only photons that are accessible by the plant. The cost of simple PPFD meters has dropped recently, and a low cost Lux meter can also be used if one adjusts for the expected spectral properties of the lighting. Roughly, aim for 10,000 Lux at the plant surface for full-spectrum lighting. There are also some phone apps that claim to provide PPFD readouts, e.g. Photone (which I've not tested).
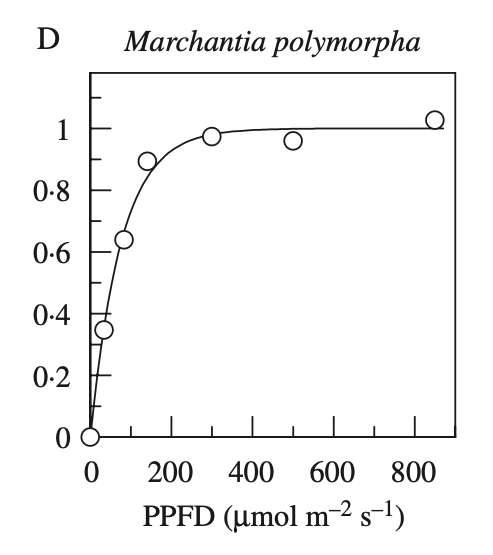
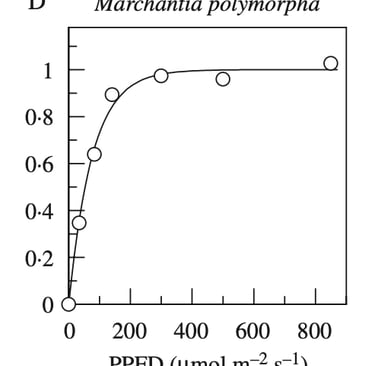
Light response curve for photosynthetic CO2 assimilation in Marchantia polymorpha. from: Are bryophytes shade plants? Photosynthetic light responses and proportions of chlorophyll a, chlorophyll b and total carotenoids. M. Marschall & MCF Proctor. Annals of Botany 94: 593–603, 2004
Construction guides
In the following sections, I have assembled instructions for building different size hydroponic units, based on my practical experiences so far. There are several common design features:
Each system is modular, comprised of stacked units that slot into each other, where the 3D printed components allow adjustment for the different components, where necessary.
The base consists of an off-the-shelf vessel, reused as a tank for holding the hydroponic nutrient solution.
Small USB-powered submersible aquarium pumps are deployed to continuously recirculate nutrient solutions.
Custom trays are designed with nutrient dam and support pegs to provide a two-way flow of nutrient, both through capillary matting that supports direct feeding of plants growing on the surface, and across the lower surface of the tray to feed rhizoids emerging from plants above.
Use of hybrid membrane for the growing surface, consisting of support mesh, efficient capillary mat and micro-perforated black plastic film to suppress contaminating algal growth.
Use of vented propagator lids or 3D printed shield to help maintain a constant environment around the plants.
LED lighting systems that are improved for plant growth, and adapted from off-the-shelf components.
I made a conscious decision to build the 'grow-pods' to be as self-contained as possible - which means that one doesn't need to worry so much about specialised lighting. external reservoirs, leaks, etc. The grow-pods can be put down on a table or shelf, where the main concern is only keeping the room temperature to normal range. This is has been an advantage for my own work in a home-based lab/workshop - and likely applies for other DIY biologists and community labs - as well as providing extra flexibility in a research lab.
There are likely more improvements to come - and I will keep track of updates on this site, with tracking notes as Bluesky posts. If you are to implement any of these designs, there will likely be variations due to difficulty obtaining materials, or intentional tweaks. It's probably wise to take an 'experimental' approach, testing any changes against a 'control' and keeping an eye out for others' developments in the field.
Marchantia as a platform for engineering plants
About Biomaker OpenPlant Cambridge Lab
Jim Haseloff
jimhaseloff@gmail.com

